
Roasted Vegetable Baked Ziti (Healthy, Cheesy & Perfect for Weeknights)
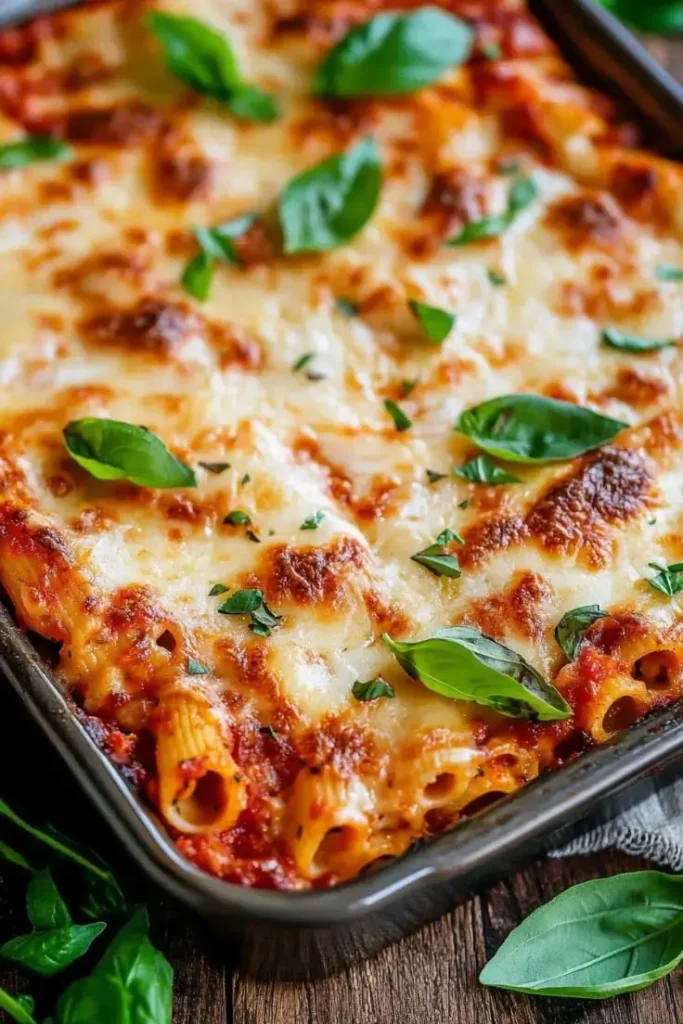
If you’re craving a dinner that feels warm, comforting, and indulgent without being heavy this Roasted Vegetable Baked Ziti is exactly what you need. Packed with tender pasta, caramelized roasted vegetables, rich marinara sauce, and melty mozzarella, this dish delivers classic Italian comfort with a lighter, veggie-forward twist. Unlike traditional baked ziti that can feel overly rich, this version leans on roasted vegetables for flavor and texture, making it hearty yet balanced. It’s perfect for a cozy family dinner or feeding a crowd, easy to prep ahead, freezer-friendly, and guaranteed to please both vegetarians and meat-lovers alike especially if you also enjoy hearty, cozy meals like Easy Chicken Pastina Soup.
Why You’ll Love This Roasted Vegetable Baked Ziti
This isn’t just another pasta bake here’s why it deserves a spot in your regular rotation:
- Comforting but Light: Roasted veggies keep it filling without feeling heavy
- Vegetarian & Family-Friendly: A crowd-pleaser for all ages
- Meal-Prep Friendly: Great for make-ahead dinners and leftovers
- Customizable: Swap veggies or cheeses based on what you have
- Perfect for Gatherings: Feeds a crowd with minimal effort
Whether you’re planning a weeknight dinner or a weekend meal, this roasted vegetable baked ziti checks all the boxes.
The Secret: Roasting the Vegetables
Roasting the vegetables is what sets this dish apart. High heat caramelizes the cauliflower, peppers, and onions, bringing out natural sweetness and deep, savory flavor. Instead of watery or bland vegetables, you get golden, tender pieces that blend beautifully with the pasta and sauce.
This step adds a restaurant-quality touch that makes the baked ziti taste far more special than a typical pasta casserole.
Roasted Vegetable Baked Ziti
Notes
- 1 medium head of cauliflower, cut into bite-sized florets
- 1 red bell pepper, cut into 1-inch squares
- 1 medium yellow onion, sliced into wedges (about ½ inch wide)
- 2 tablespoons extra-virgin olive oil, divided
- ¼ teaspoon fine sea salt, divided
- 8 ounces ziti, rigatoni, or penne pasta
- 4 cups (32 ounces) marinara sauce (homemade or store-bought), divided
- ¼ cup fresh basil, chopped (plus extra for garnish)
- 8 ounces (2 packed cups) grated part-skim mozzarella cheese, divided
- 2 cups (16 ounces) cottage cheese or ricotta cheese, divided
- Roast the Vegetables:
- Preheat your oven to 425°F, placing racks in the middle and upper thirds of the oven. Line two large, rimmed baking sheets with parchment paper.
- Spread the cauliflower florets on one baking sheet, and the bell peppers and onion on the other.
- Drizzle each pan with half of the olive oil and sprinkle with the sea salt. Toss gently to coat the vegetables evenly.
- Arrange the vegetables in a single layer on each pan. Roast for 30-35 minutes, flipping and swapping the pans’ positions halfway through, until the vegetables are tender and caramelized. Set them aside when done, keeping the oven at 425°F for baking the ziti.
- Cook the Pasta:
- Bring a large pot of salted water to a boil. Cook the pasta according to package directions, but be sure to leave it slightly firm since it will continue cooking while baking. Drain and return to the pot.
- Stir in 2 cups of marinara sauce, the chopped basil, and ½ cup of mozzarella. Mix gently.
- Assemble the Baked Ziti:
- Spread 1 cup of marinara sauce evenly across the bottom of a 9×13-inch baking dish.
- Layer half of the pasta mixture on top, spreading it into an even layer.
- Add the roasted cauliflower evenly over the pasta, then dollop 1 cup of cottage cheese over it (no need to smooth it out). Sprinkle ½ cup of mozzarella over the top.
- Add the second half of the pasta mixture, then top with the roasted peppers and onion. Dollop the remaining cup of cottage cheese on top, followed by another cup of marinara sauce, and finish with the remaining mozzarella cheese.
- Bake the Ziti:
- Place a rimmed baking sheet on the lower oven rack to catch any drips. Set the ziti on the upper rack.
- Bake uncovered for 30 minutes, then move the dish to the top rack for an additional 2-5 minutes, or until the cheese turns a rich golden color.
- Remove from the oven and let it cool for 10 minutes before slicing.
- Serve:
- Garnish with freshly torn basil, slice, and serve.
- Gluten-Free Option: Use gluten-free pasta (such as corn and quinoa blend).
- Make Ahead: You can roast the vegetables up to 3 days ahead of time. The dish can also be assembled and refrigerated until you’re ready to bake.
- Freezing: The assembled ziti can be frozen before baking.
- Vegan Option: Substitute with a vegan sour cream or similar product for the cottage cheese and omit the mozzarella for a dairy-free version.
- Make Ahead: Assemble the dish up to 24 hours in advance and refrigerate
- Freezing: Freeze before baking for best results
- Leftovers: Store baked ziti in the fridge for up to 4 days
- Reheating: Warm in the oven or microwave with a splash of sauce
Frequently Asked Questions (FAQs)
1. Can I add more vegetables to roasted vegetable baked ziti?
Yes! Zucchini, mushrooms, spinach, or eggplant work beautifully in this recipe.
2. Is cottage cheese better than ricotta?
Both work well. Cottage cheese is lighter, while ricotta is richer and creamier.
3. Can I make this recipe vegan?
Yes. Use dairy-free cheese alternatives and vegan ricotta substitutes.
4. What pasta shape works best?
Ziti is classic, but penne or rigatoni are great alternatives that hold sauce well.
5. How do I keep baked ziti from drying out?
Make sure there’s enough sauce and cover loosely if reheating to retain moisture.
Conclusion
This Roasted Vegetable Baked Ziti is the perfect blend of comfort food and wholesome eating. With caramelized vegetables, tender pasta, and layers of creamy, melty cheese, it delivers everything you love about baked pasta without feeling heavy or overly rich.
Whether you’re feeding your family, prepping meals ahead of time, or hosting guests, this dish is reliable, satisfying, and endlessly adaptable. Once you try it, it’s sure to become a go-to favorite in your kitchen.