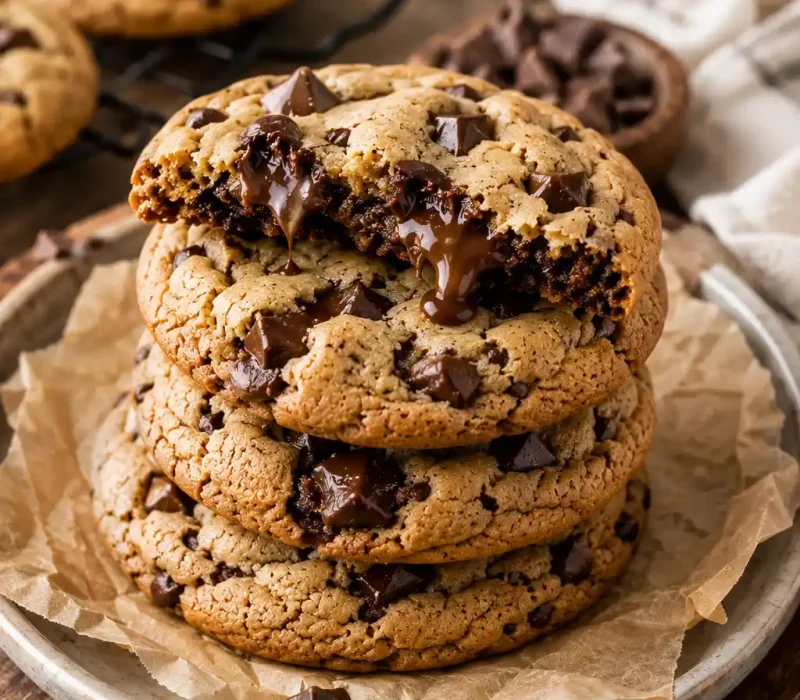
Why These Are the Best Chocolate Chip Cookies You’ll Ever Make
You know that cookie from a fancy bakery the one with crispy golden edges, a soft and gooey center, and a flavor so deep and rich it tastes almost caramel-like? You’ve probably wondered how they do it.
The secret? Brown butter.
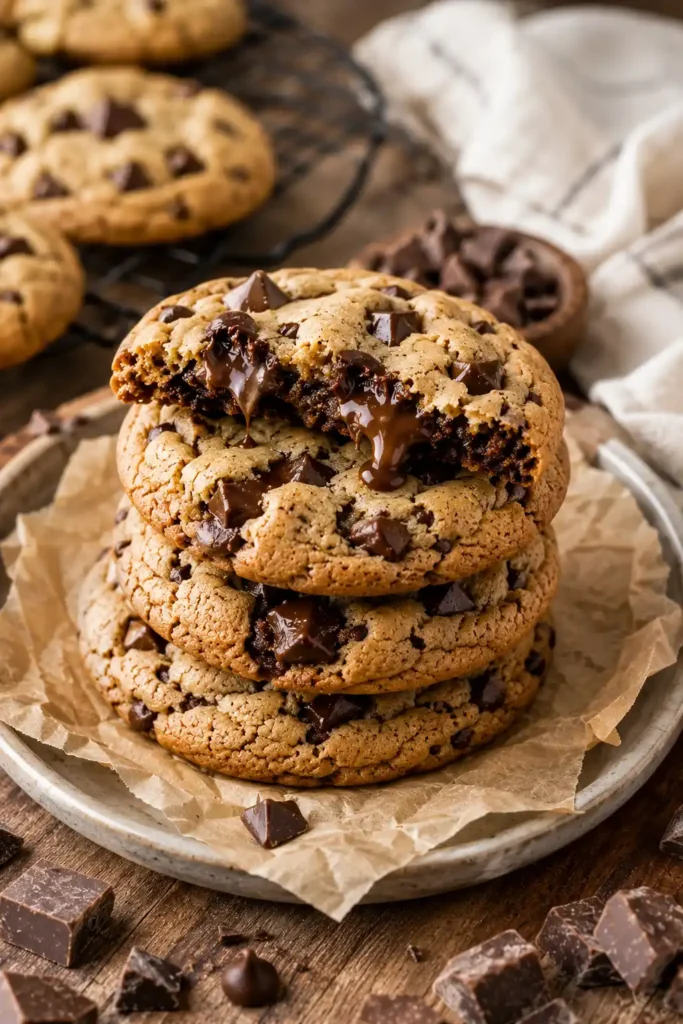
Brown Butter Chocolate Chip Cookies are the most searched, most pinned, and most loved cookie recipe on the internet and for good reason. They take the classic chocolate chip cookie you already love and elevate it to something extraordinary, using the same everyday ingredients. The only difference is a simple technique that adds layers of nutty, toffee-like depth that regular melted butter simply cannot deliver.
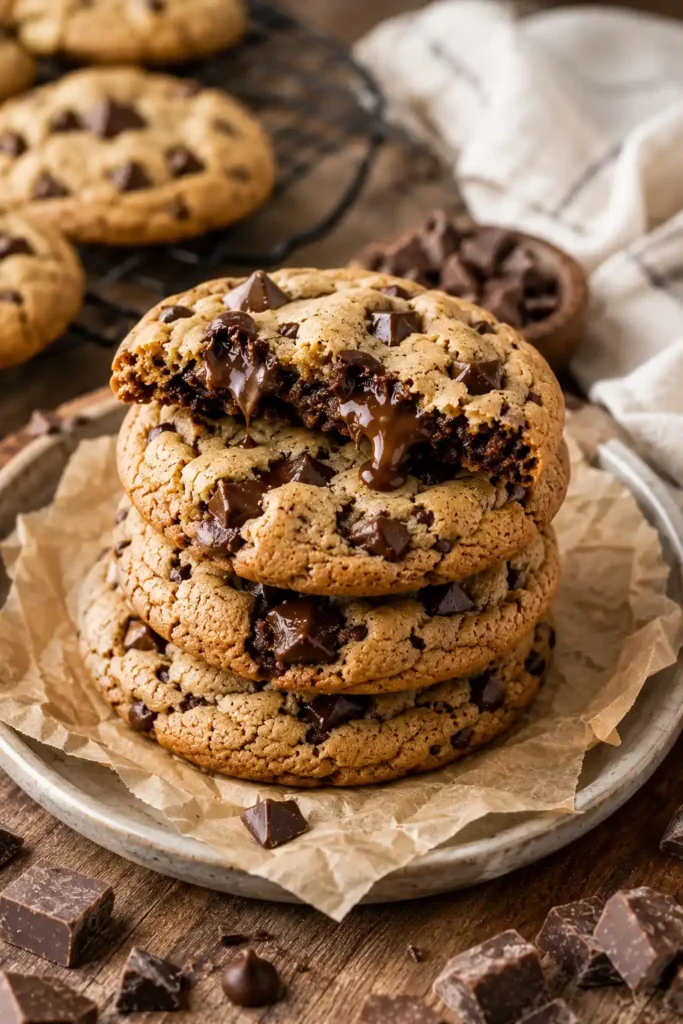
This is not just another recipe post. This is your complete, A to Z guide covering everything from the science behind brown butter to pro-level baking tips, common mistakes, storage methods, variations, and FAQs. By the time you finish reading, you’ll have everything you need to bake the best cookies of your life.
What’s In This Guide
- What is brown butter and why does it matter
- Complete ingredients list with exact measurements
- What each ingredient does and why it’s important
- Step-by-step instructions (with photos tips)
- Pro baker tips for perfect cookies every single time
- Common mistakes and how to fix them
- How to store, freeze, and reheat
- Delicious flavor variations
- Frequently asked questions
What Is Brown Butter? (And Why Does It Change Everything?)
Brown butter known in French as Beurre Noisette (meaning “hazelnut butter”) is simply regular butter that has been cooked until the water evaporates and the milk solids turn a deep golden brown.
Here’s what happens when you brown butter:
- Water evaporates from the butter as it heats up
- Milk solids separate and sink to the bottom of the pan
- Those milk solids toast and caramelize, creating hundreds of new flavor compounds
- The result is a rich, nutty, toffee-like aroma and flavor that transforms any baked good
When used in cookies, brown butter doesn’t just add flavor it changes the entire experience. Every bite carries warm, caramel-like undertones that you simply can’t get from softened or melted butter. This is why these cookies are called bakery style. They taste like they came from a professional kitchen, even though they were made in yours.
Ingredients What You Need
(Makes approximately 16–18 cookies)
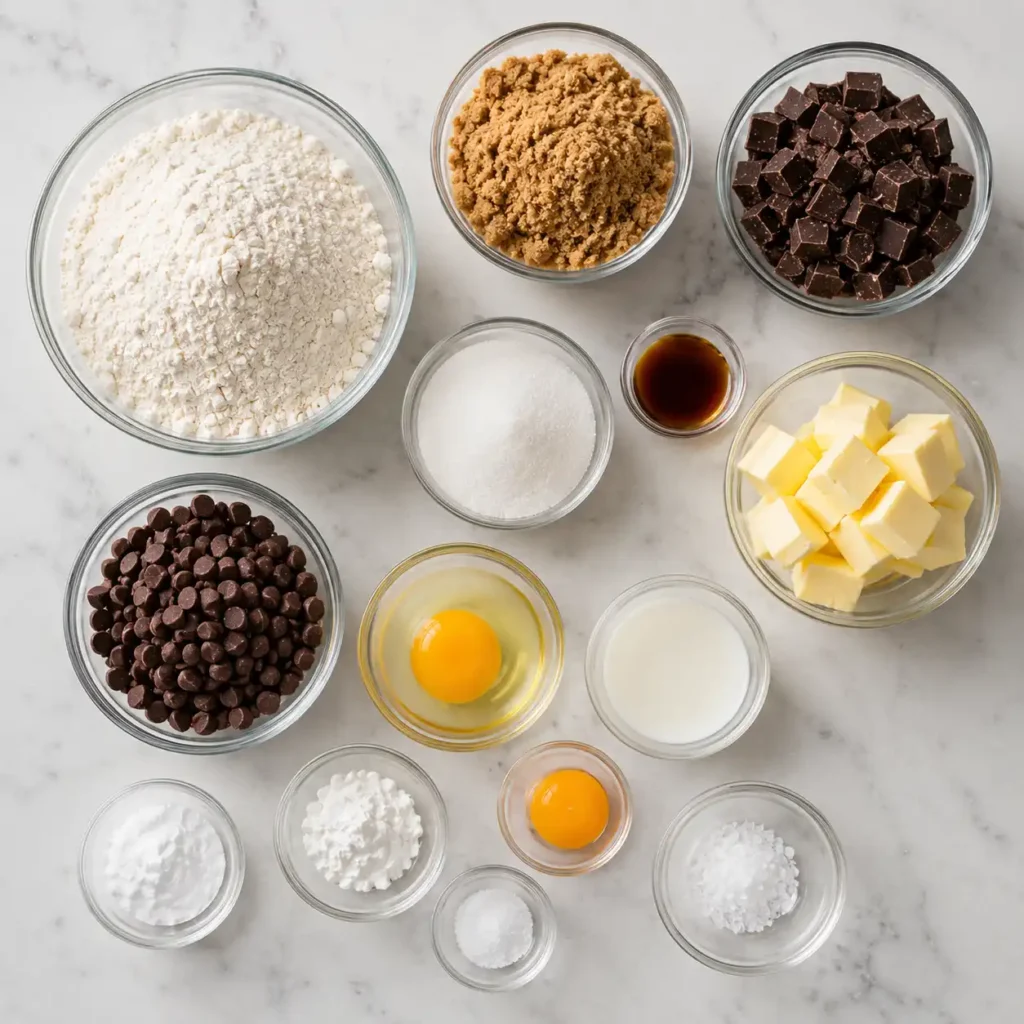
Butter & Sugar
| Ingredient | Amount |
|---|---|
| Unsalted butter | ¾ cup (170g) |
| Light brown sugar | ¾ cup (150g), packed |
| Granulated white sugar | ¼ cup (50g) |
Eggs, Dairy & Flavor
| Ingredient | Amount |
|---|---|
| Large egg | 1 whole |
| Egg yolk | 1 extra |
| Pure vanilla extract | 1 teaspoon |
| Whole milk | 1 tablespoon |
Dry Ingredients
| Ingredient | Amount |
|---|---|
| All-purpose flour | 1¾ cups (220g) |
| Baking soda | ½ teaspoon |
| Cornstarch | 1 teaspoon |
| Salt | ½ teaspoon |
Chocolate & Finishing
| Ingredient | Amount |
|---|---|
| Semi-sweet chocolate bar, roughly chopped (or chocolate chips) | 1½ cups (250g) |
| Flaky sea salt (for topping) | As needed |
Equipment You Needed
- Large mixing bowl
- Medium mixing bowl
- Electric mixer or hand whisk
- Rubber spatula
- Measuring cups and spoons
- Baking sheet
- Parchment paper
- Cookie scoop
- Cooling rack
Why Each Ingredient Matters The Science Behind the Cookie
Most recipes tell you what to add. This guide tells you why and that makes you a better baker.
Brown Butter: The star of the show. It adds nutty, caramelized depth that regular butter cannot replicate. This is the ingredient that separates a good cookie from an unforgettable one.
More Brown Sugar Than White Sugar: Brown sugar contains molasses, which attracts moisture and keeps cookies chewy and soft for days. White sugar encourages spread and gives you those crispy, caramelized edges. The combination of both creates the perfect texture contrast.
Whole Egg + Extra Egg Yolk: The whole egg provides structure and moisture. The extra yolk a pro baker’s secret adds richness, fat, and extra chewiness without making the cookie cakey.
Cornstarch: This is the texture secret. Cornstarch makes cookies softer and more tender, giving them that melt-in-your-mouth quality.
Milk: When you brown butter, water evaporates and the volume reduces. Adding a tablespoon of milk replaces that lost moisture, keeping the dough balanced and the final cookie soft rather than crumbly.
Chopped Chocolate Bar vs. Chocolate Chips: Chocolate bars melt better than chips. Chips contain stabilizers (like polyglycerol polyricinoleate) that prevent them from fully melting. A chopped bar creates large, irregular pockets of gooey, molten chocolate also called “chocolate puddles” that give cookies a professional, bakery-style appearance and a more indulgent bite.
Flaky Sea Salt: Added on top after baking, flaky salt (like Maldon) enhances sweetness, balances richness, and adds a satisfying crunch. It’s a small addition that makes a massive difference.
Step-by-Step Instructions
Step 1 Brown the Butter
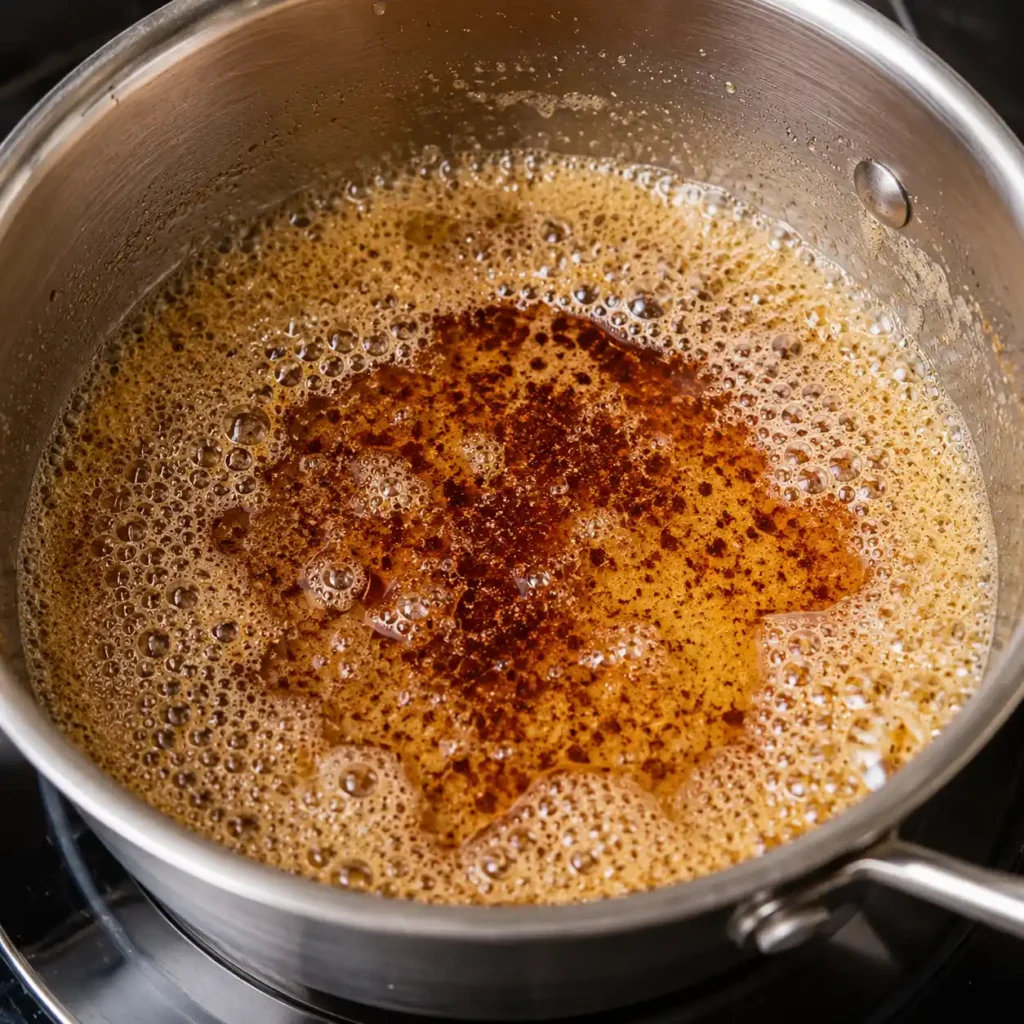
Place the butter in a light-colored saucepan over medium heat. (Use a light pan so you can monitor the color change clearly dark pans make it hard to tell when the butter is done.)
As the butter melts, it will begin to foam. Keep stirring. After 4–7 minutes, you’ll notice:
- The foam begins to settle
- The butter turns a deep amber golden color
- Small brown specks appear on the bottom of the pan
- A warm, nutty aroma fills the kitchen
Immediately remove the pan from heat and pour the brown butter into a heatproof bowl. Make sure to scrape every last bit from the bottom those browned bits carry the most flavor.
Watch carefully: Brown butter can go from perfect to burnt in seconds. Keep the heat at medium, not high, and never walk away.
Let the brown butter cool to room temperature (about 30–45 minutes), or place it in the freezer for 15 minutes until it reaches a soft, paste-like consistency not liquid, not solid.
Step 2 Combine Butter and Sugars
Add the brown sugar and granulated sugar to the cooled brown butter. Whisk vigorously by hand until the mixture is smooth, glossy, and well combined. This should take about 1 minute.
Step 3 Add Eggs, Milk, and Vanilla
Add the whole egg, extra egg yolk, milk, and vanilla extract. Whisk energetically for 12 full minutes until the mixture lightens in color and looks thick and creamy. This step is important it adds air and helps create the right texture.
Step 4 Incorporate the Dry Ingredients
In a separate bowl, whisk together the flour, baking soda, cornstarch, and salt. Add this dry mixture to the wet ingredients and stir gently with a spatula until just combined.
Do not overmix. Once the flour disappears into the dough, stop. Overmixing develops gluten, which makes cookies tough and dense instead of tender and chewy.
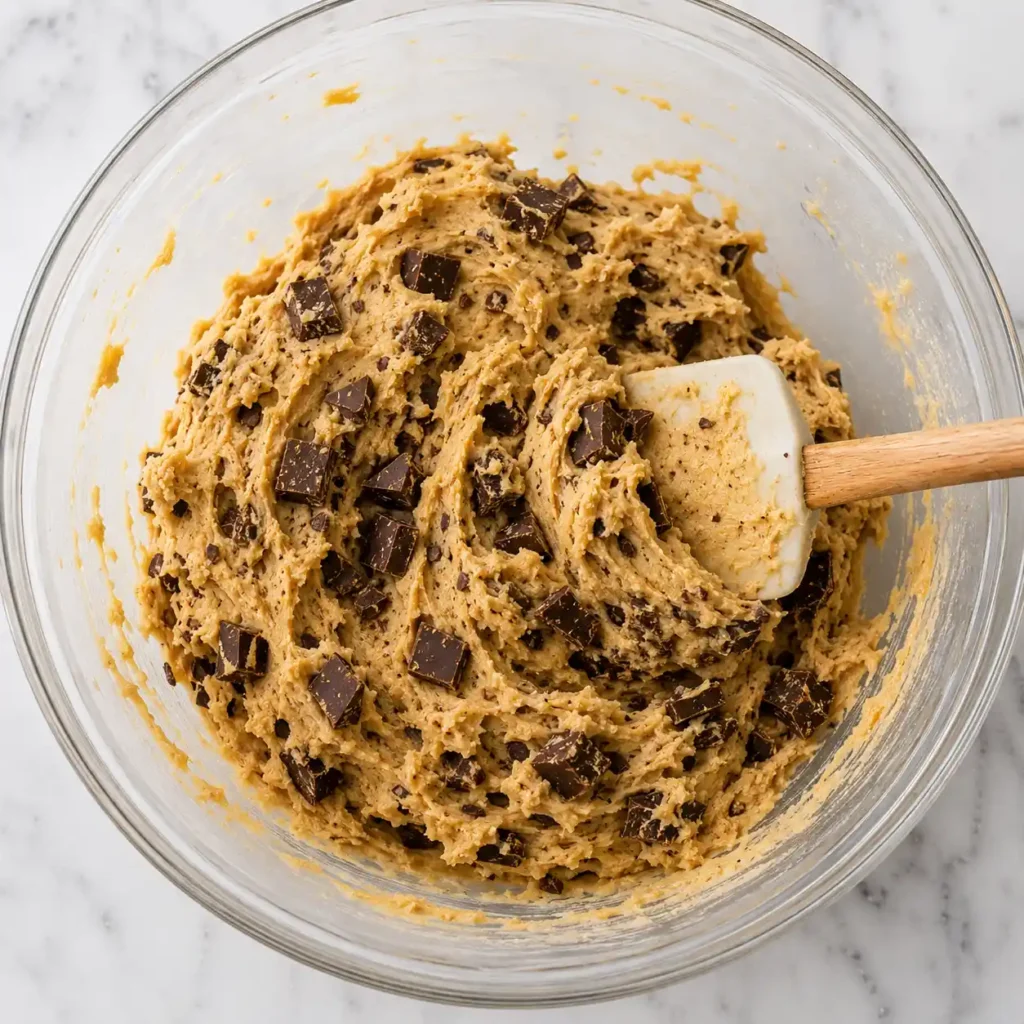
Step 5 Fold in the Chocolate
Add the chopped chocolate (or chips) and gently fold it into the dough with a spatula until evenly distributed.
Step 6 Chill the Dough
Cover the dough tightly with plastic wrap and refrigerate for at least 30 minutes. For even better results, chill overnight.
Why chill? Chilling solidifies the fat in the dough, which slows the spread during baking. This results in cookies that are thicker, chewier, and have more developed flavor. It’s an extra step that’s absolutely worth it.
Step 7 Preheat Oven and Shape the Cookies
Preheat your oven to 350°F (175°C). Line two baking sheets with parchment paper.
Scoop the dough into balls using about 2 tablespoons per cookie. Roll each ball between your palms until smooth. Place them on the prepared baking sheet, spacing them at least 2 inches (5cm) apart so they have room to spread without merging.
Pro tip: For extra visual appeal, press a few extra chocolate chunks on top of each dough ball before baking.
Step 8 Bake
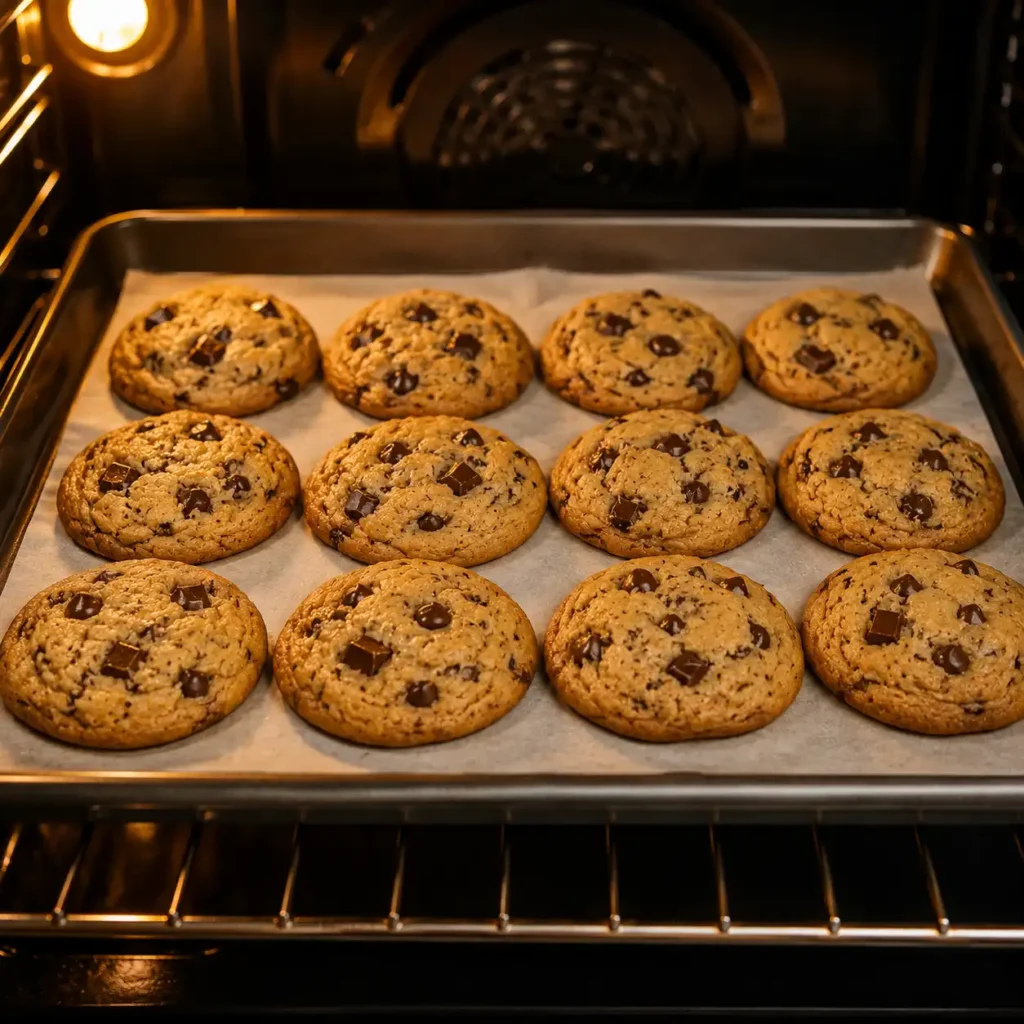
Bake for 10–12 minutes, until the edges are just set and lightly golden. The centers will still look slightly underdone this is exactly what you want.
The golden rule: slightly underbake. Cookies continue cooking on the hot baking sheet after they’re removed from the oven. Pull them out when the centers look underdone and they’ll be perfectly soft and chewy once cooled.
Step 9 Finishing Touches and Cooling
While the cookies are still warm, immediately sprinkle with flaky sea salt. Let them cool on the baking sheet for 5 minutes before transferring to a wire rack.
Shaping trick: Right after they come out of the oven, use a large round cookie cutter or the rim of a glass to gently swirl around each cookie in a circular motion. This nudges any uneven edges back into a perfect circle a simple trick that makes your cookies look bakery-professional.
Pro Tips for Perfect Cookies Every Time
Measure flour correctly. Never scoop your measuring cup directly into the flour bag this compresses the flour and leads to using too much, resulting in dry, cakey cookies. Instead, spoon flour into the cup and level it off with the back of a knife. Better yet, use a kitchen scale: 1 cup flour = 125g.
Use a mix of chocolate sizes. When chopping the chocolate bar, aim for irregular pieces some small, some large. Bigger chunks create dramatic pools of melted chocolate. Smaller pieces distribute flavor throughout.
Don’t skip the egg yolk. That extra yolk is what makes these cookies noticeably richer and chewier than a standard recipe. It’s a small thing that makes a big difference.
Use room temperature eggs. Cold eggs don’t incorporate as well into the batter. Take them out of the fridge 30 minutes before baking.
Chill the dough. Even 30 minutes helps. Overnight is even better the flavors develop deeper and the texture becomes superior.
Bake one sheet at a time. If you bake two sheets simultaneously, the one on the bottom rack may overbake while the top underbakes. One sheet at a time, middle rack, gives the most even results.
Let the butter cool fully. If you use brown butter while it’s still warm or liquid, the cookies will spread into flat, greasy puddles. It must cool to a soft, paste-like consistency.
Make a double batch. This recipe doubles perfectly. Freeze raw dough balls for future use fresh cookies any day of the week with zero effort.
Common Mistakes and How to Fix Them
| Mistake | Why It Happens | How to Fix It |
|---|---|---|
| Cookies spread too thin and flat | Brown butter was still warm/liquid | Cool the butter completely before using |
| Cookies are too cakey or thick | Too much flour | Spoon and level flour, or weigh it |
| Cookies are tough or hard | Overmixed dough | Stir until flour just disappears, then stop |
| No nutty flavor | Butter wasn’t browned enough | Cook until deeply amber with browned bits |
| Cookies are dry and crumbly | Moisture lost from butter not replaced | Always add the tablespoon of milk |
| Cookies spread and merge | Placed too close together | Leave at least 2 inches between each |
| Centers are raw even after 12 minutes | Oven runs cool | Use an oven thermometer to check accuracy |
| Cookies burn on the bottom | Dark baking pan | Use a light-colored pan with parchment paper |
How to Store, Freeze, and Reheat
At Room Temperature
Store baked cookies in an airtight container at room temperature for up to 4–5 days. Add a slice of white bread to the container the cookies absorb moisture from the bread and stay soft longer.
In the Freezer Baked Cookies
Place cooled cookies in a single layer in a freezer-safe bag or container. Freeze for up to 3 months. Thaw at room temperature for 30 minutes, or microwave for 15–20 seconds to enjoy them warm.
In the Freezer Raw Cookie Dough (Best Method)
Scoop the dough into balls and place them on a parchment-lined baking sheet. Freeze for 2 hours until solid, then transfer to a labeled zip-lock bag. Freeze for up to 3 months.
When ready to bake: no need to thaw. Bake straight from frozen at 350°F just add 2–3 extra minutes to the bake time. This is the secret to having fresh, warm cookies available anytime.
Delicious Variations to Try
Once you’ve mastered the base recipe, the possibilities are endless:
1. Brown Butter Nutella-Stuffed Cookies
Flatten each dough ball slightly, place a teaspoon of frozen Nutella in the center, and wrap the dough around it. The hidden Nutella melts into a warm, gooey surprise.
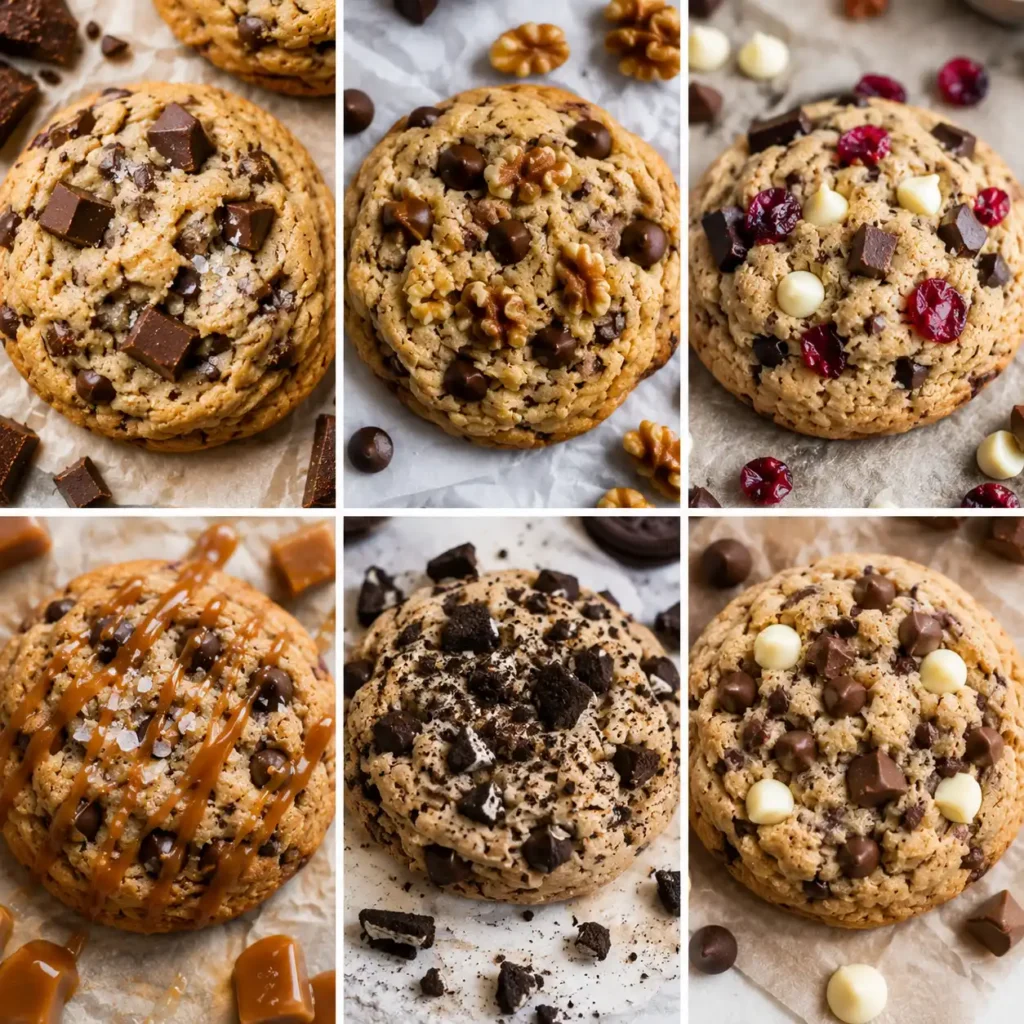
2. Brown Butter Espresso Cookies
Dissolve 1 teaspoon of instant espresso powder in the vanilla extract before adding. Coffee intensifies chocolate flavor and adds a subtle mocha depth.
3. Brown Butter S’mores Cookies
Fold in crushed graham crackers and mini marshmallows along with the chocolate. During baking, the marshmallows melt into golden pools campfire magic without the campfire.
4. Brown Butter M&M Cookies
Replace half (or all) of the chocolate with colorful M&Ms for a fun, kid-friendly version.
5. Brown Butter Oatmeal Chocolate Chip
Add ½ cup of rolled oats to the dry ingredients. This creates a heartier, chewier cookie with extra texture.
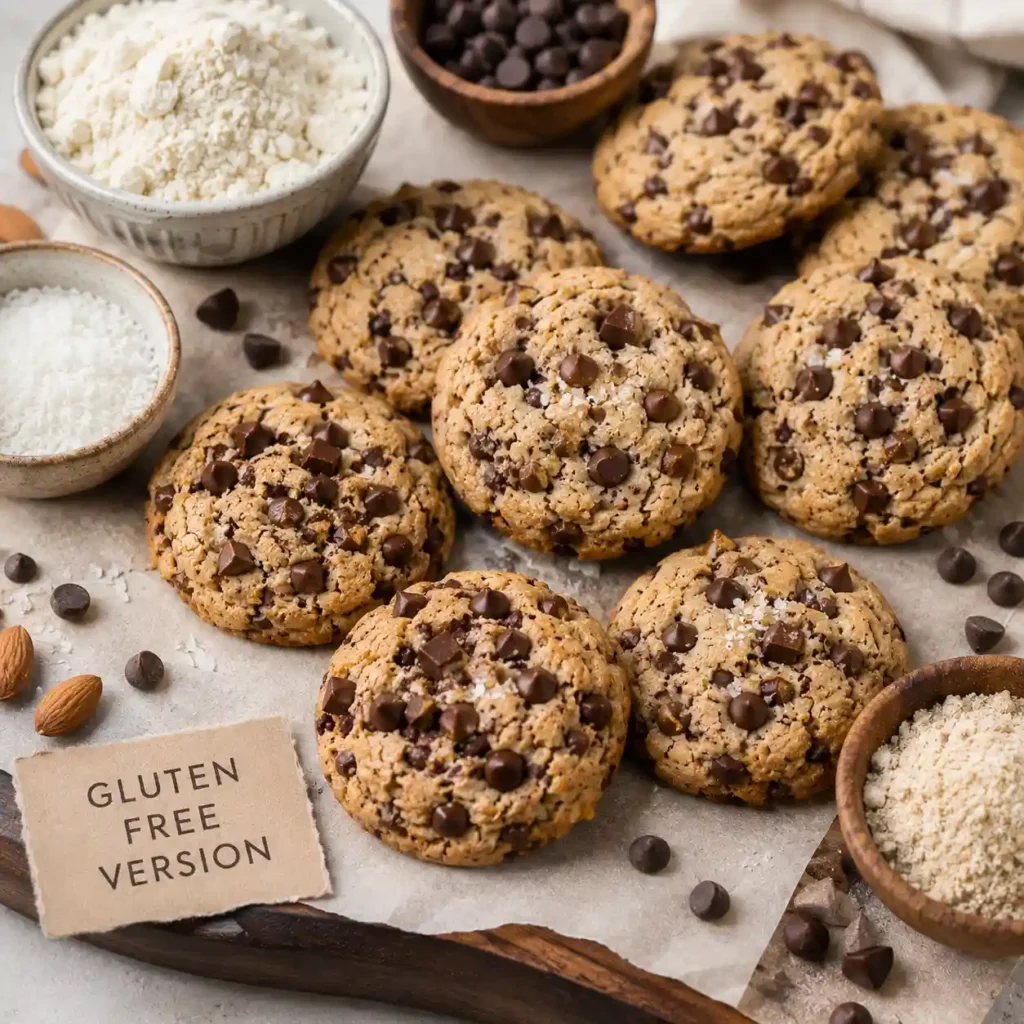
6. Gluten Free Version
Substitute the all-purpose flour with a 1:1 gluten-free flour blend (like King Arthur’s). The texture and flavor remain nearly identical.
Frequently Asked Questions (FAQs)
Can I use salted butter instead of unsalted?
Yes! Salted butter works great and actually enhances the nutty flavor of the brown butter. Just reduce the added salt in the recipe by half (use ¼ teaspoon instead of ½).
Is chilling the dough really necessary?
It’s not strictly required, but it’s highly recommended. Chilling prevents excess spreading, creates a thicker cookie, and allows the flavors to develop. At minimum, 30 minutes in the fridge makes a noticeable difference.
Can I use chocolate chips instead of a chopped chocolate bar?
Absolutely though a chopped bar gives better results. Chocolate bars melt more fully and create larger pools of chocolate. Chips work fine if that’s what you have.
What if my brown butter smells burnt?
If the butter turns black (not deep amber) and smells acrid or bitter — discard it and start over. Burnt butter will ruin the cookies. Brown butter should smell nutty, not bitter.
How do I know when the cookies are done?
The edges will be set and lightly golden, but the centers will look slightly underdone and even a little shiny. That’s perfect. They finish baking from the residual heat of the pan as they cool.
Can I bake these in a convection oven?
Yes reduce the temperature by 25°F (about 15°C), so bake at 325°F (160°C). Convection circulates air and bakes faster, so watch closely.
Why did my cookies turn out flat?
The most common cause is warm butter. If the brown butter was still liquid or warm when added to the dough, it causes excessive spreading. Always cool it to a soft, paste-like consistency.
How many cookies does this recipe make?
Approximately 16–18 cookies using 2-tablespoon dough balls. For larger cookies (bakery-style), use 3 tablespoons per ball and add 1–2 minutes to the bake time.
Can I make the dough ahead of time?
Yes! The dough keeps in the refrigerator for up to 72 hours, or in the freezer for 3 months. This actually improves the flavor.
Can I double this recipe?
Absolutely. This recipe scales perfectly. Double every ingredient and divide the dough between batches.
The Bottom Line
Brown Butter Chocolate Chip Cookies are proof that one small technique can completely transform a familiar recipe. The act of browning butter takes less than 10 minutes, costs nothing extra, and unlocks a depth of flavor that no other cookie can match.
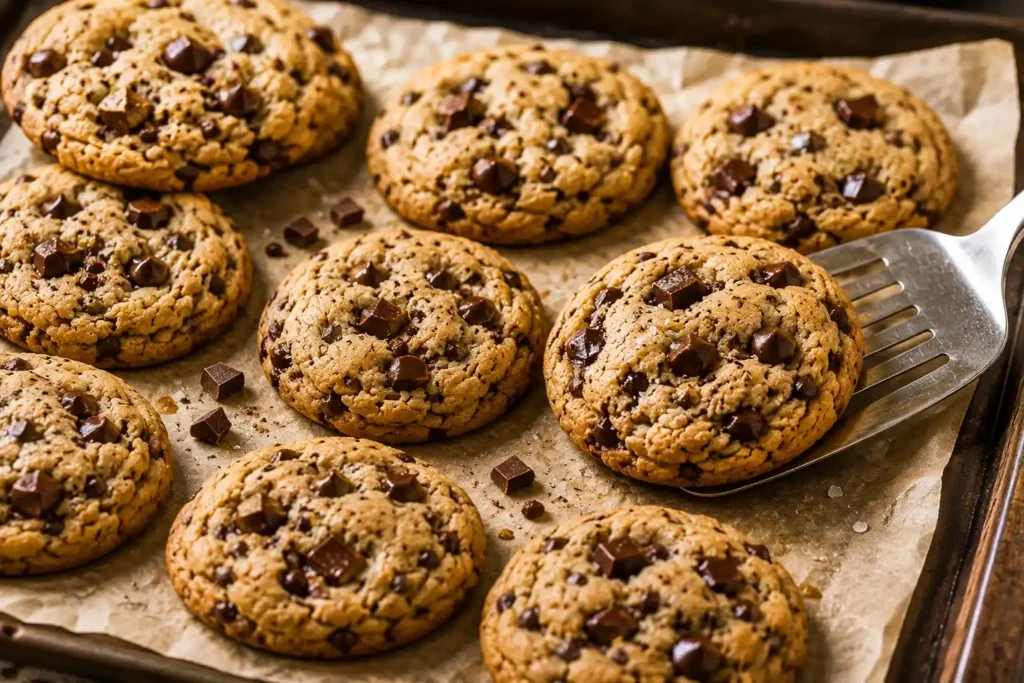
Whether you’re baking for yourself, for a gathering, or to impress someone special this recipe delivers every single time. The crispy edges, the gooey chocolate puddles, the soft chewy center, the hint of sea salt, and that unmistakable nutty caramel undertone all come together in what might just be the perfect cookie.
Make them once, and they’ll become your signature recipe forever.
Chocolate Chip Cookies Recipe
Notes
Ingredients
- 2¼ cups (280g) all-purpose flour
- 1 tsp baking soda
- ½ tsp baking powder
- ½ tsp salt
- 1 cup (226g) unsalted butter, softened
- ¾ cup (150g) granulated sugar
- ¾ cup (165g) light brown sugar, packed
- 2 tsp pure vanilla extract
- 2 large eggs
- 2 cups (340g) semi-sweet chocolate chips
- ½ cup chocolate chunks (optional)
- Flaky sea salt for topping (optional)
Instructions
- Step 1 Preheat your oven to 350°F (175°C). Line two baking sheets with parchment paper.
- Step 2 In a medium bowl, whisk together the flour, baking soda, baking powder, and salt.
- Step 3 In a large bowl, beat the softened butter, granulated sugar, and brown sugar until light and fluffy, about 2–3 minutes.
- Step 4 Beat in the eggs one at a time, then mix in the vanilla extract until fully combined.
- Step 5 Gradually add the dry ingredients to the wet mixture, mixing just until no dry flour remains. Do not overmix.
- Step 6 Fold in the chocolate chips and chocolate chunks using a spatula.
- Step 7 For thicker cookies, chill the dough for 30 minutes.
- Step 8 Scoop about 2 tablespoons of dough onto the prepared baking sheets, leaving 2 inches between each cookie.
- Step 9 Bake for 10–12 minutes, or until the edges are golden brown while the centers still look slightly soft.
- Step 10 Let the cookies cool on the baking sheet for 5 minutes, then transfer them to a wire rack to cool completely.
Notes
- Use room-temperature butter and eggs for the best texture.
- Don’t overbake; the cookies will continue to set as they cool.
- Chilling the dough creates thicker, chewier cookies.
- Sprinkle flaky sea salt on warm cookies for extra flavor.
- For bakery-style cookies, use a mix of chocolate chips and chocolate chunks.
Freezing
Freeze baked cookies or unbaked cookie dough for up to 3 months. Thaw overnight in the refrigerator or bake directly from frozen, adding 1–2 minutes to the baking time.Nutrition (Per Cookie)
Calories: 210 kcal Carbohydrates: 28g Protein: 3g Fat: 10g Saturated Fat: 6g Cholesterol: 30mg Sodium: 110mg Fiber: 1g Sugar: 18g