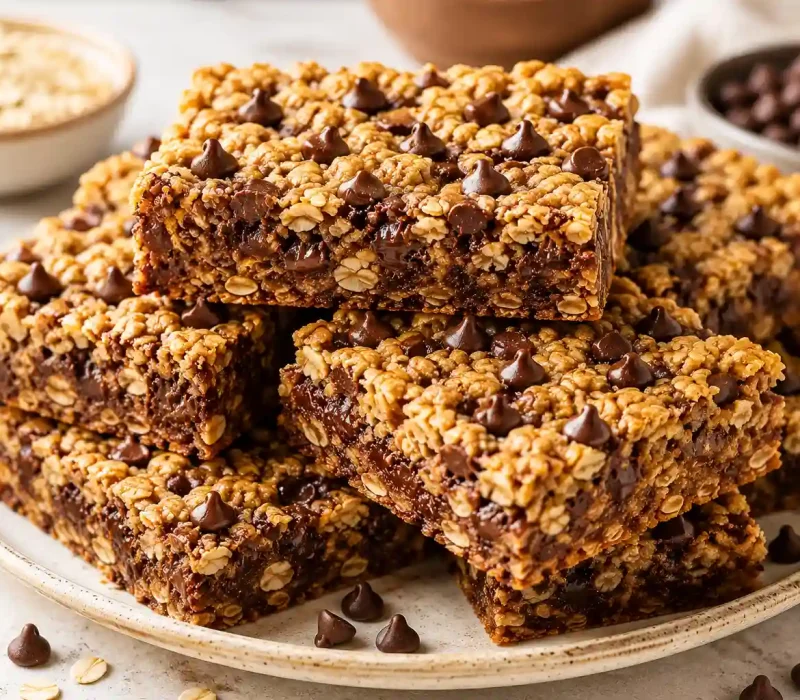
If you’ve ever stood in your kitchen wishing you could have the flavor of a chocolate chip cookie, the heartiness of an oatmeal cookie, and the “just cut a square and go” convenience of a blondie this recipe is the answer. These oatmeal chocolate chip cookie bars are thick, buttery, loaded with melty chocolate, and slightly chewy at the edges with a soft, tender center. Best of all, there’s no scooping dozens of individual cookies, no chilling the dough, and no stand mixer required.
This is a one-bowl (technically two-bowl) recipe that comes together in under 15 minutes of hands-on work and bakes in a single 9×13 pan which makes it one of the most searched or “easy dessert for a crowd” recipes on Pinterest and Google every single week, especially around potlucks, bake sales, holidays, and school events.
Below you’ll find everything you need: the science of why this recipe works, ingredient notes and substitutions, step by step instructions, common mistakes (and how to avoid them), flavor variations, storage and freezing instructions, and a full FAQ section answering the questions people actually type into Google.
A note on how this recipe was developed: This recipe was built by testing three variables side by side melted butter vs. creamed butter, rolled oats vs. quick oats, and regular butter vs. browned butter to figure out exactly which combination gives the thickest, chewiest result without drying out. The version below is the one that won every round. If you try the brown butter variation mentioned further down, expect an extra 5 minutes of prep time and a noticeably deeper, nuttier flavor.
Why This Recipe Works
- Melted structure, not whipped structure. Creaming butter and sugar together (rather than melting the butter) traps air, which is what gives these bars a soft, cake-like chew instead of a dense, fudgy texture.
- Old-fashioned rolled oats, not quick oats. Rolled oats hold their shape during baking, giving the bars texture and bite. Quick oats break down and make the bars mushier (more on this in the substitutions section below).
- A double dose of chocolate. Chocolate chips are mixed into the dry ingredients and folded in again at the end, which prevents the chips from sinking and guarantees chocolate in every single bite.
- Baked low and slow in a big pan. Spreading the dough into a 9×13 pan (instead of scooping individual cookies) means the edges don’t overbake before the center sets which is the 1 reason homemade cookie bars turn out dry.
- Underbake by 2 minutes. The bars firm up significantly as they cool. Pulling them the moment they look “almost done” is the single biggest secret to that bakery style chewy center.
Ingredients You’ll Need
| Ingredient | Why It’s Here |
| Unsalted butter, softened | Fat + flavor base; creaming it with sugar builds structure |
| Brown sugar (light or dark) | Adds moisture, chew, and a caramel note the more brown sugar relative to white sugar, the chewier the bar |
| Granulated sugar | Adds sweetness and helps the edges set with a light crisp |
| Eggs | Bind the dough and add richness |
| Vanilla extract | Rounds out the flavor |
| Salt | Balances the sweetness don’t skip it |
| Cinnamon (optional but recommended) | Adds warmth that makes the oats taste more like a classic oatmeal cookie rather than a plain blondie |
| Baking soda + baking powder | Baking soda spreads and browns; baking powder gives a slight lift so the bars aren’t dense |
| All purpose flour | The structural backbone |
| Old fashioned rolled oats | Chew, texture, and that “oatmeal cookie” identity |
| Chocolate chips | Semi-sweet, milk, dark, or a mix your choice |
Substitutions
- Quick oats instead of rolled oats: Works, but the bars will be slightly softer and less textured. Use the same quantity.
- Butter substitute: Plant-based butter sticks (not the tub/spreadable kind) work in a 1:1 swap for a dairy-free version.
- Egg-free version: Replace each egg with 1 flax egg (1 tbsp ground flaxseed + 2.5 tbsp water, rested 5 minutes). The bars will be slightly denser but still delicious.
- Gluten-free version: Swap the all-purpose flour for a 1:1 gluten-free baking blend and confirm your oats are certified gluten-free.
- Add-ins: Dried cranberries, chopped walnuts or pecans, butterscotch chips, or a swirl of peanut butter all work beautifully in place of (or alongside) some of the chocolate chips.
- Less sweet version: Reduce total sugar by up to ¼ cup without affecting the texture significantly.
Step by Step Instructions
1. Prep your pan
Preheat your oven to 350°F (180°C). Line a 9×13-inch pan with parchment paper, leaving an overhang on two sides this “sling” lets you lift the entire slab out later for clean, bakery style cuts.
2. Cream the butter and sugars
In a large bowl, beat the softened butter with both sugars until light and fluffy, about 2 minutes. This step matters more than people think it’s where the chew comes from.
Want a deeper flavor? Brown the butter first: melt it in a light-colored saucepan over medium heat, swirling often, until it turns amber and smells nutty (about 5-6 minutes). Let it cool for 10 minutes before creaming with the sugars. This adds a toffee-like depth that plain softened butter can’t match it’s a small extra step for a noticeably more “bakery-style” flavor.
3. Add eggs and vanilla
Beat in the eggs one at a time, then the vanilla, until fully incorporated and slightly pale in color.
4. Mix the dry ingredients separately
In a second bowl, whisk together the flour, oats, baking soda, baking powder, salt, and cinnamon (if using). Whisking (instead of just stirring) distributes the leaveners evenly, which prevents random dense or overly-puffed spots in the bake.
5. Combine
Add the dry mixture to the wet mixture and stir just until no dry streaks remain. Overmixing at this stage develops gluten and makes the bars tough stop as soon as it’s combined.
6. Fold in the chocolate
Fold in most of the chocolate chips, reserving a handful to press on top of the batter before baking. This gives you that gorgeous “bakery display” look with visible chips on the surface.
7. Press and bake
Spread the dough evenly into the prepared pan, pressing gently into the corners. Bake for 22–27 minutes, until the top is golden and the edges just start to pull away from the pan, but the center still looks very slightly underdone.
8. The most important step: let them cool
Set the pan on a wire rack and let the bars cool completely ideally 1–2 hours before lifting them out and cutting. Cutting too early is the 1 reason bars fall apart or look gummy in the middle. They aren’t undercooked; they just need time to set.
Common Mistakes (And How to Fix Them)
- Bars are dry or cakey Likely overbaked, or too much flour was packed into the measuring cup. Spoon flour into your measuring cup and level it off instead of scooping directly from the bag.
- Center sinks after cooling Usually caused by underbaking too aggressively, opening the oven door repeatedly, or old baking soda/powder. Test your leaveners if they’re more than 6 months old.
- Bars are greasy on top Butter was too warm/melted rather than just softened. Butter should give slightly when pressed but still hold its shape.
- Bars won’t cut cleanly They haven’t cooled enough. Popping the whole pan in the fridge for 20 minutes after it reaches room temperature makes cutting even neater.
- Chocolate chips all sank to the bottom Toss the chips in a teaspoon of flour before folding them in; this helps them “grip” the batter and stay suspended.
Flavor Variations to Try
- Brown Butter Version: Brown the butter first and let it cool slightly before creaming with the sugars for a nutty, toffee-like depth.
- S’mores Bars: Add mini marshmallows and crushed graham crackers with the chocolate chips.
- Peanut Butter Swirl: Dollop softened peanut butter over the batter and swirl with a knife before baking.
- Triple Chocolate: Use a mix of dark, milk, and white chocolate chips instead of one type.
- Fall Spice: Add ½ teaspoon cinnamon and a pinch of nutmeg to the dry ingredients for a cozy, spiced version.
- Salted Caramel: Drizzle caramel sauce over the top halfway through baking and finish with flaky sea salt after baking.
Storage & Freezing Instructions
Room temperature: Store in an airtight container for up to 5 days. A slice of bread in the container helps keep them soft for longer.
Refrigerator: Up to 10 days in an airtight container bring to room temperature before serving for the best texture.
Freezer (whole slab): Wrap the cooled, uncut slab tightly in plastic wrap, then foil. Freeze for up to 2 months. Thaw overnight in the fridge before cutting.
Freezer (individual bars): Cut into squares, freeze in a single layer on a tray until solid, then transfer to a freezer bag. Grab and go individual bars thaw at room temperature in about 30 minutes.
The History Behind Oatmeal Chocolate Chip Bars
Oatmeal cookies date back to the late 1800s, when oats became widely available in the U.S. as a packaged pantry staple Quaker Oats famously printed one of the first oatmeal cookie recipes on its oat container in 1908 to encourage home bakers to use oats beyond breakfast porridge. The classic oatmeal cookie (often with raisins) became a household staple through the early to mid 1900s as a slightly “healthier” alternative to a plain sugar cookie, thanks to the fiber and heartiness oats added.
Chocolate chips entered the picture later, after Ruth Wakefield invented the chocolate chip cookie at the Toll House Inn in Massachusetts in 1938. Once chocolate chips became a pantry staple of their own, bakers naturally began swapping or combining them with the raisins in oatmeal cookie recipes giving rise to the oatmeal chocolate chip cookie we know today.
The “bar” version is a more modern convenience twist. As potlucks, bake sales, and school events grew in popularity through the mid-1900s, home bakers looked for ways to make cookies faster and in larger batches without individually portioning dozens of scoops. Pressing the same dough into a single pan creating what’s often called a “cookie bar” or “blondie-style” dessert became a practical shortcut that kept all the flavor of the original cookie while cutting prep time significantly. Today, oatmeal chocolate chip cookie bars are one of the most popular potluck and lunchbox desserts precisely because they combine a nostalgic flavor with modern convenience.
Equipment You’ll Need
- 9×13-inch baking pan
- Parchment paper
- Large mixing bowl
- Medium mixing bowl
- Hand mixer or stand mixer
- Rubber spatula
- Measuring cups and spoons
- Wire cooling rack
- Small saucepan (optional)
Pro tip: If you don’t have a hand mixer, this dough can absolutely be made by hand with a wooden spoon and some elbow grease it will just take a minute or two longer to get the butter and sugar properly light and fluffy.
Frequently Asked Questions
Can I use quick oats instead of old-fashioned rolled oats?
Yes, quick oats work in the same quantity, but the bars will turn out slightly softer with less visible oat texture since quick oats absorb moisture faster and break down more during baking.
Why are my oatmeal cookie bars gummy in the middle?
This almost always means they were cut before fully cooling. The center continues to set as the bars cool, so give them at least 1–2 hours at room temperature before cutting.
Can I make these ahead of time?
Yes they actually taste even better the next day once the flavors settle. Bake, cool completely, cover, and store at room temperature.
Can I double the recipe?
Yes, but bake it in two separate 9×13 pans rather than one larger pan, since a deeper single pan will need significantly more time and may overbake on the edges before the center sets.
Do I need to chill the dough before baking?
No, unlike drop cookies, this dough goes straight into the pan without chilling, which is part of what makes this recipe so fast.
Can I make these without eggs?
Yes, substitute each egg with a flax egg (1 tablespoon ground flaxseed mixed with 2.5 tablespoons water, rested for 5 minutes) for an egg-free version.
What’s the difference between these and blondies?
Blondies typically skip the oats and lean into a brown sugar, butterscotch flavor profile. These bars use rolled oats for texture and a heartier, oatmeal cookie identity.
Can I add nuts?
Yes chopped walnuts or pecans (about ½ to ¾ cup) fold in well alongside or in place of some of the chocolate chips.
Is browned butter really worth the extra step?
If you have 10 extra minutes, yes browning the butter adds a nutty, toffee like depth that plain softened butter doesn’t provide. If you’re short on time, softened butter still produces excellent, thick, chewy bars; the browned butter version is a flavor upgrade, not a fix for a problem.
Can I bake these as individual cookies instead of bars?
Yes. Scoop rounded tablespoons of dough onto a lined baking sheet and bake at the same oven temperature for roughly half the time (10-12 minutes), watching closely since individual cookies bake much faster than a full pan.
Final Thoughts
These oatmeal chocolate chip cookie bars solve the exact problem so many home bakers run into: wanting a homemade dessert that feeds a crowd without spending an hour scooping individual cookies. One bowl, one pan, 45 minutes start to finish, and a texture that hits that sweet spot between chewy cookie and soft blondie. Save this recipe, pin it for later, and let us know in the comments how yours turned out!
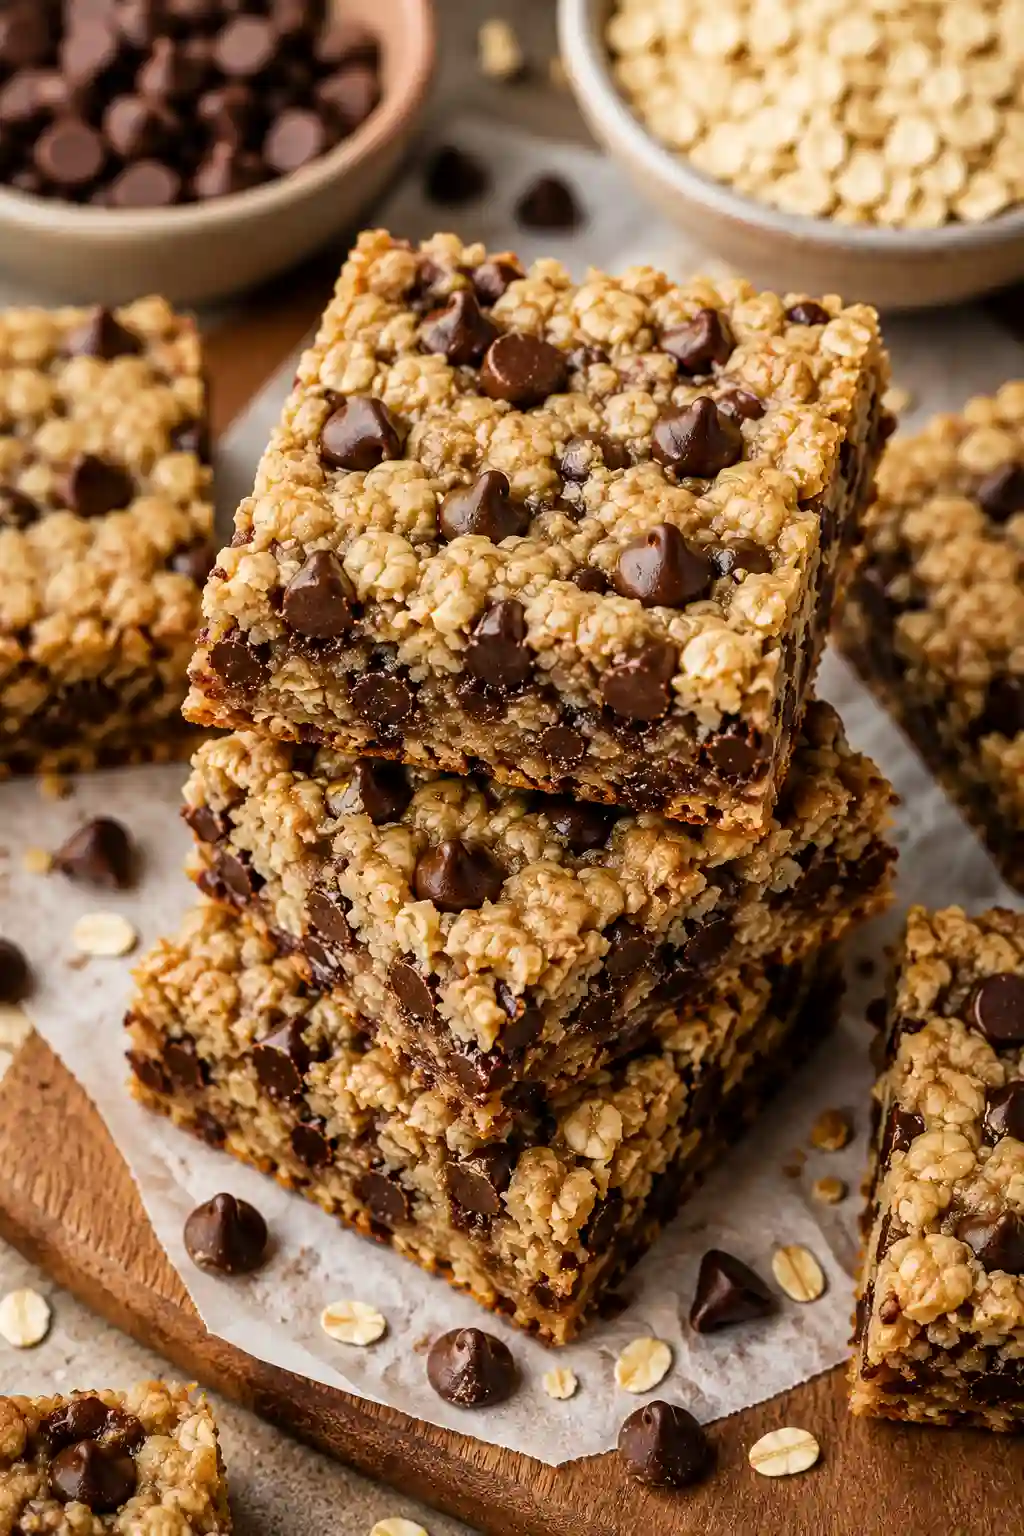
Oatmeal Chocolate Chip Cookie Bars
Notes
Ingredients
For the bars:- 1 cup (226g) unsalted butter, softened
- 1 cup (200g) brown sugar, packed
- ½ cup (100g) granulated sugar
- 2 large eggs
- 2 tsp vanilla extract
- 1 tsp salt
- ½ tsp ground cinnamon (optional)
- 1 tsp baking soda
- ½ tsp baking powder
- 2 ¼ cups (280g) all-purpose flour
- 2 ½ cups (225g) old-fashioned rolled oats
- 2 cups (340g) chocolate chips, divided
Instructions
- Preheat oven to 350°F (180°C). Line a 9×13-inch pan with parchment paper, leaving overhang on two sides.
- In a large bowl, beat softened butter with brown sugar and granulated sugar until light and fluffy, about 2 minutes.
- Beat in eggs one at a time, then vanilla, until fully combined.
- In a separate bowl, whisk together flour, oats, baking soda, baking powder, salt, and cinnamon.
- Add dry mixture to wet mixture and stir just until no dry streaks remain. Do not overmix.
- Fold in 1 ½ cups of chocolate chips.
- Spread dough evenly into prepared pan, pressing into corners. Sprinkle remaining ½ cup chocolate chips on top.
- Bake for 22-27 minutes, until edges are golden and center looks just slightly underdone.
- Cool completely in the pan on a wire rack, 1-2 hours, before lifting out and cutting into squares.
Notes
- Use old-fashioned rolled oats, not quick oats, for the best texture.
- For deeper flavor, brown the butter before creaming with sugars (add 5-10 minutes).
- Store at room temperature in an airtight container for up to 5 days, or freeze for up to 2 months. Nutrition (per bar, 24 servings) Based on 24 servings per pan. Values will vary depending on the exact brands and add ins used. Calories 250 kcal Carbohydrates 33g Protein 3g Fat 12g Saturated Fat 6g Sodium 140mg Fiber 1g