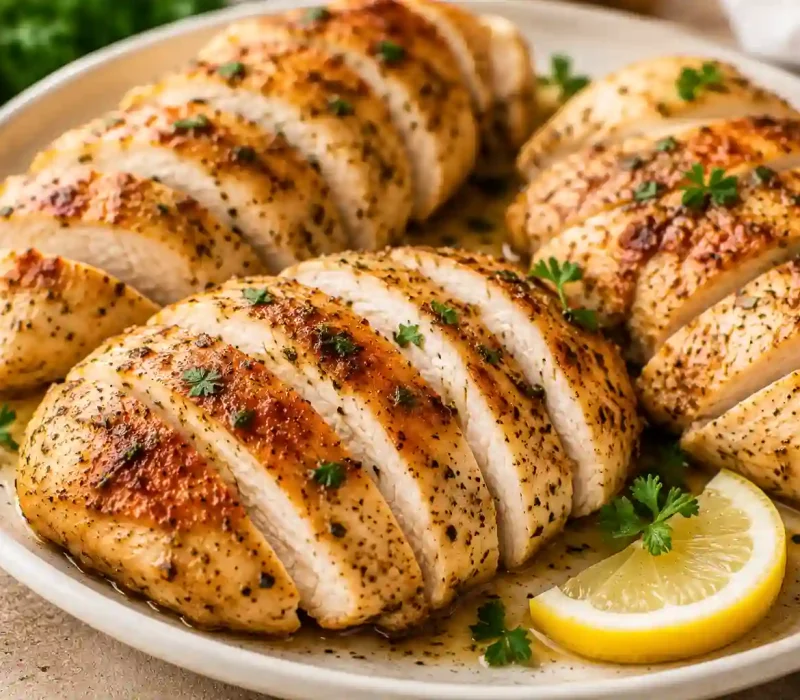
Dry, chewy chicken breast can ruin a weeknight dinner. This oven baked chicken breast recipe solves that problem with three simple steps. First, pound the chicken to an even thickness. Next, bake it at a high temperature. Finally, let it rest before slicing. No brining is required. You also do not need a complicated marinade. A simple seasoning blend and about 20 minutes in the oven are all it takes.
I’ve baked chicken breast countless times. This method consistently produces juicy results. It avoids the dry, stringy texture that often comes from baking chicken too long. The brown sugar in the seasoning plays an important role. As it bakes, it helps create a light caramelized glaze. That glaze protects the surface from drying out. At the same time, the inside stays tender and juicy.
Why You’ll Love This Recipe
- Genuinely juicy, no brining needed. High heat and even thickness do the heavy lifting.
- Ready in about 20–25 minutes. Fast enough for a weeknight, reliable enough for meal prep.
- Just one seasoning blend. No long ingredient list pantry staples do all the flavor work.
- Naturally high protein and low carb. A clean base for salads, bowls, wraps, or a simple plated dinner.
- Meal prep friendly. Bake a big batch on the weekend and use it across several meals during the week.
What Is Oven Baked Chicken Breast?
Oven baked chicken breast is made with boneless, skinless chicken breast that is seasoned and baked until fully cooked. It does not require breading, frying, or a stovetop sauce. This recipe is one of the most searched chicken dishes online. Chicken breast is affordable, lean, and versatile. However, it can be easy to overcook. That is why a reliable cooking method is so important. This is especially true when compared to fattier cuts like chicken thighs.
The popularity of baked chicken breast grew with the rise of high-protein meal prep. Many home cooks began preparing several portions at once for the week ahead. Before that, chicken breast often had a poor reputation. People chose it because it seemed like a healthy option. However, many recipes produced dry and bland results. A hot oven helps solve that problem. So does pounding the chicken to an even thickness. A short resting period also helps keep the meat juicy and tender.
Ingredient Breakdown
- Boneless, skinless chicken breasts (5–6 oz each) Try to buy breasts of a similar size so they finish cooking around the same time. If your breasts are noticeably larger, plan on a few extra minutes in the oven.
- Olive oil Helps the seasoning adhere to the chicken and adds a bit of richness to the surface as it bakes.
- Brown sugar This is the ingredient people are most surprised by. As it bakes, it draws a small amount of moisture out of the chicken to the surface, creating a light glaze that caramelizes rather than burns, which helps lock in juiciness rather than drying the chicken out.
- Paprika (regular or smoked) Adds color and a subtle smoky depth. Smoked paprika brings more complexity if you have it on hand.
- Dried oregano (or thyme) A simple herbal note that rounds out the seasoning without overpowering it. Swap in Italian seasoning or rosemary if that’s what’s in your pantry.
- Garlic powder Adds savory depth without the risk of burning that fresh minced garlic carries at high oven heat.
- Salt and black pepper Essential for bringing all the other flavors forward don’t skip or reduce these even if you’re cutting sodium elsewhere in your day, since under seasoned chicken breast tastes flat no matter how well it’s cooked.
Equipment Needed
- Baking sheet or dish Line with foil or parchment for easy cleanup.
- Meat mallet, rolling pin, or the flat bottom of a skillet For pounding the chicken to an even thickness.
- Plastic wrap, parchment, or a zip top bag To cover the chicken while pounding, so it doesn’t splatter.
- Small mixing bowl For combining the dry seasoning blend.
- Instant read meat thermometer The single most useful tool here it removes all guesswork about doneness.
Step by Step Instruction
1. Preheat the oven
Set your oven to 425°F. This high heat is intentional it cooks the chicken quickly, which gives moisture less time to evaporate, while still developing a light golden color on the surface. Line a baking sheet with foil or parchment.
2. Pound the chicken to an even thickness.
Place each chicken breast between two sheets of plastic wrap or inside a zip top bag, and gently pound with a mallet or rolling pin until it’s about 0.6 inches (roughly 1.5 cm) thick at its thickest point. This single step is the reason most home baked chicken breast turns out unevenly cooked thinner edges finish long before a thick center does, and pounding closes that gap.
3. Mix the seasoning.
In a small bowl, combine the brown sugar, paprika, oregano, garlic powder, salt, and pepper.
4. Season the chicken.
Drizzle half the olive oil over the chicken and rub it in, then coat evenly with half the seasoning blend. Flip each piece, and repeat with the remaining oil and seasoning on the other side.
5. Bake until done
Arrange the chicken on the prepared baking sheet and bake for 18–20 minutes, or until an instant read thermometer inserted into the thickest part reads 165°F. Smaller breasts may be done closer to 16–18 minutes larger ones may need a few extra minutes always check temperature rather than relying on time alone.
6. Rest before slicing
Let the chicken rest for 3–5 minutes before cutting into it. This gives the juices time to redistribute through the meat instead of running out onto the cutting board the moment you slice in.
7. Slice against the grain
If you’re slicing the chicken rather than serving it whole, cut across the direction of the muscle fibers rather than along them. This breaks up the fibers and makes each bite noticeably more tender.
Expert Tips for Best Results
- Pound the chicken to a truly even thickness this one step prevents more dry, overcooked chicken than any other single change you can make.
- Bake hot and fast rather than low and slow a shorter time in a hotter oven gives moisture less opportunity to escape.
- Always check for doneness with a thermometer rather than cutting into the chicken to check, which lets juices escape before you’re ready to eat.
- Don’t skip the resting step, even though it’s tempting to serve immediately it’s a small wait with a real payoff in juiciness.
- Slice against the grain for the most tender texture, especially if you’re using the chicken in salads, wraps, or grain bowls.
Common Mistakes to Avoid
- Baking at too low a temperature. A cooler oven means a longer cook time, and a longer cook time gives more moisture a chance to evaporate before the chicken is done.
- Skipping the pounding step. Uneven thickness is the most common reason for chicken that’s dry at the edges and just barely done in the center.
- Overcooking past 165°F. Chicken breast has very little fat to buffer against overcooking, so even a few extra minutes past done can noticeably dry it out.
- Cutting into the chicken immediately after baking. This releases the juices you worked to keep in, leaving the meat drier than it needs to be.
- Using breasts of very different sizes in the same batch. Mismatched sizes mean some pieces finish well before others, leading to uneven results across a single batch.
Variations and Customizations
- Chicken thighs: Swap in boneless, skinless thighs for a richer flavor and more forgiving texture adjust baking time slightly, since thighs can vary in thickness.
- Different herb blends: Rosemary, thyme, or a store bought Italian seasoning blend all work well in place of oregano.
- Sweet and spicy: Add a pinch of cayenne or extra smoked paprika to the seasoning mix for a subtle kick.
- Glazed finish: Brush the baked chicken with honey mustard, barbecue sauce, or a garlic butter mixture right after it comes out of the oven for extra flavor.
- Optional brining: If you want to build in extra insurance against dryness, a quick 15–20 minute soak in a simple saltwater brine before seasoning can add another layer of moisture, though it’s genuinely optional with this high heat method.
Storage Instructions
- Refrigerator: Store cooled chicken in an airtight container for up to 3–4 days.
- Freezer: Slice or leave whole, wrap tightly, and freeze in a freezer safe bag or container for up to 3 months. Thaw overnight in the refrigerator before reheating.
- Meal prep containers: Divide into individual portions with sides for grab and go lunches throughout the week.
Reheating Instructions
- Oven (best method): Reheat at 350°F for about 10 minutes, or until warmed through, to help preserve moisture and texture.
- Microwave: Reheat in 30 second bursts, covering the chicken loosely and adding a small splash of water or broth to the container to help keep it from drying out.
- Skillet: Slice the chicken and warm it gently in a covered pan over medium low heat with a splash of broth or a small pat of butter.
Frequently Asked Questions
Can I use chicken thighs instead of chicken breasts?
Yes. Boneless, skinless thighs stay juicy and flavorful, and generally forgive slight overcooking better than breasts do, but they may need a few extra minutes in the oven depending on their thickness.
Why do I need to pound the chicken breast?
Pounding creates an even thickness throughout the piece, which means it cooks at the same rate all the way through. Without it, thinner edges dry out while a thicker center is still catching up.
Can I bake chicken breast at a lower temperature?
You can, but baking at 425°F is recommended because the shorter cook time gives moisture less opportunity to escape, resulting in juicier chicken with a lightly golden exterior. Lower temperatures tend to produce less browning and can dry the chicken out over a longer bake.
Do I need to brine the chicken first?
No, brining is optional with this method. The combination of even thickness, high heat, and a short rest time is generally enough to keep the chicken juicy without an extra brining step, though brining can add a further layer of insurance if you’d like.
How do I know when the chicken is fully cooked?
The most reliable way is an instant read thermometer inserted into the thickest part of the breast, which should read 165°F. Cutting into the chicken to check color is less accurate and releases juices before you’re ready to serve.
Why does the recipe include brown sugar?
Brown sugar draws a small amount of moisture to the chicken’s surface as it bakes, creating a light, caramelized glaze that helps protect against dryness while adding a subtle sweetness that balances the savory seasoning.
Can I freeze baked chicken breast?
Yes. Let it cool completely, then wrap tightly and freeze for up to 3 months. Thaw in the refrigerator overnight before reheating for the best texture.
A Few Honest Final Thoughts
This isn’t a recipe trying to reinvent chicken breast it’s trying to finally make it reliable. Pound it evenly, bake it hot, and give it a few minutes to rest before you cut in, and you’ll have juicy, flavorful chicken you can build almost any meal around. It’s the kind of basic that’s worth actually getting right, since you’ll probably be making it often.
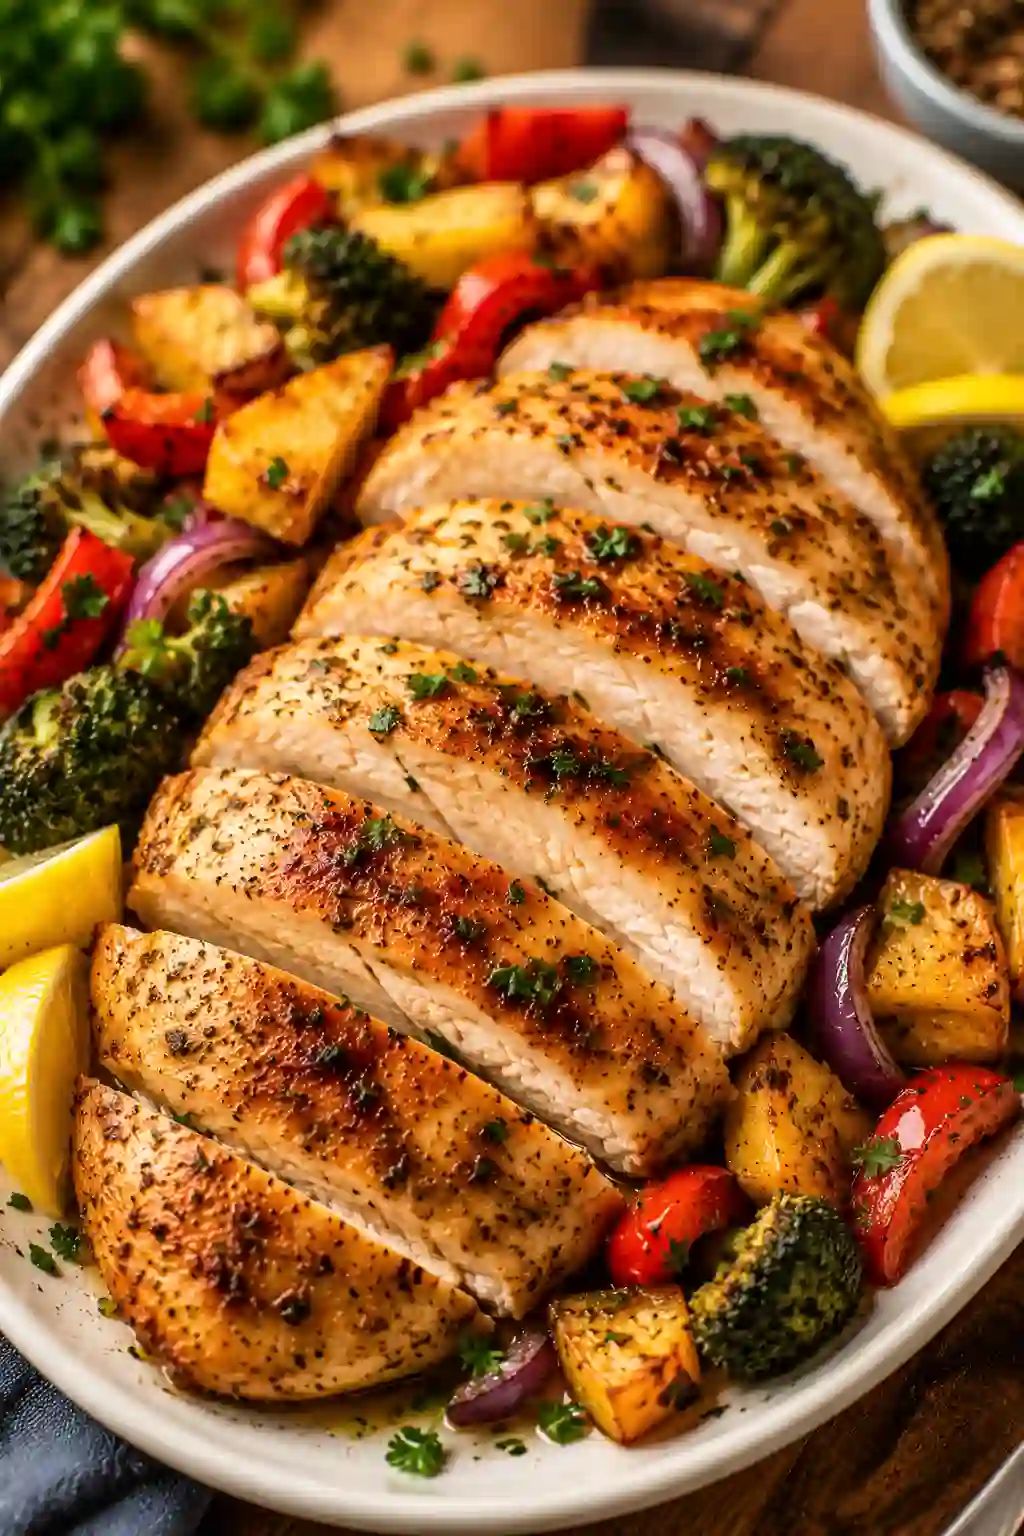
Oven Baked Chicken Breast
Notes
Ingredients
- 4 boneless, skinless chicken breasts (150–180g / 5–6 oz each)
- 2 teaspoons olive oil
- 1 ½ tablespoons brown sugar
- 1 teaspoon paprika
- 1 teaspoon dried oregano (or thyme)
- ¼ teaspoon garlic powder
- ½ teaspoon salt
- ½ teaspoon black pepper
- Fresh chopped parsley, for garnish (optional)
Instructions
- Preheat oven to 425°F. Line a baking sheet with foil or parchment.
- Place chicken between sheets of plastic wrap and pound to an even 0.6 inch (1.5 cm) thickness.
- Mix brown sugar, paprika, oregano, garlic powder, salt, and pepper in a small bowl.
- Drizzle half the olive oil over the chicken, rub in, and coat with half the seasoning. Flip and repeat with remaining oil and seasoning on the other side.
- Bake 18–20 minutes, until internal temperature reaches 165°F.
- Rest 3–5 minutes before slicing. Slice against the grain if serving sliced, and garnish with parsley if desired.
Notes
- Always check doneness with a thermometer rather than cutting into the chicken.
- Bake hot and fast (425°F) rather than low and slow for the juiciest result.
- Don’t skip resting it keeps the juices in the meat instead of on the cutting board.
Storage
- Fridge: Airtight container, up to 3–4 days.
- Freezer: Wrapped tightly, up to 3 months thaw overnight before reheating.
- Reheat: Oven at 350°F for about 10 minutes, or microwave in 30 second bursts with a splash of water added.