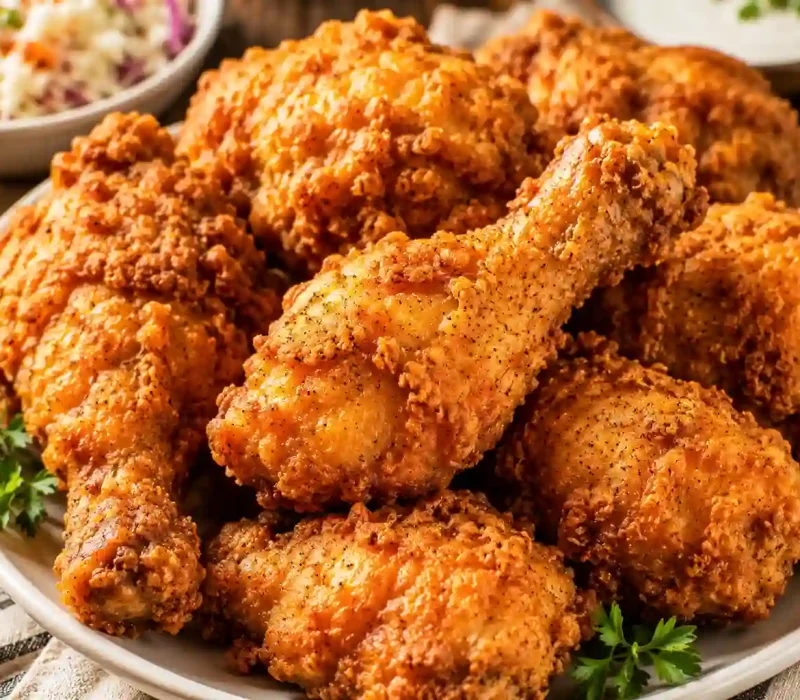
Crispy Juicy Fried Chicken is the ultimate comfort food with a crunchy golden coating and tender, flavorful meat. However, that result doesn’t happen by accident. The secret starts with seasoning the chicken ahead of time. Next, build plenty of flavor into the flour coating. Then, let the breaded chicken rest before frying. These simple steps create a crispy coating that stays in place and delivers great flavor in every bite.
I’ve fried chicken many times over the years. As a result, I’ve learned that patience makes all the difference. Let the seasoned chicken rest before breading. Then, allow the coated pieces to sit on a wire rack. Meanwhile, heat the oil to the proper temperature. Finally, let the oil return to temperature between batches. None of these steps are difficult. However, skipping even one can leave you with soggy coating or unevenly cooked chicken.
Why You’ll Love This Crispy Juicy Fried Chicken
- Genuinely crispy, genuinely juicy. A layered seasoning approach and a proper rest before frying deliver both at once.
- Better than a drive thru version. No preservatives, and you control exactly how much salt and spice goes in.
- Customizable heat and flavor. The spice blend is easy to dial up or down to your taste.
- A real centerpiece dish. Impressive enough for a gathering, but not complicated enough to dread making.
- Make ahead friendly. Season and bread the chicken in advance so frying day is quick.
What Makes Fried Chicken “Southern Style”?
Fried chicken has a rich history in the American South. It developed through the blending of several culinary traditions. Scottish immigrants brought the technique of deep-frying meat in fat. Meanwhile, West African cooks contributed bold seasonings and their own poultry-frying traditions. Enslaved and later free African American cooks refined these methods over time. As a result, Southern fried chicken became the flavorful dish we know today.
Over time, fried chicken remained a special-occasion meal because it required time and effort to prepare. However, it became more common in American home kitchens during the 20th century. Fast-food restaurants also helped make it famous around the world.
For example, Kentucky Fried Chicken introduced Southern style fried chicken to millions of people. This recipe follows that same tradition. Instead, it adapts the technique for a home kitchen with a well-seasoned double coating that turns out crispy and delicious.
Ingredient Breakdown for Crispy, Juicy Fried Chicken
Bone in chicken (drumsticks and thighs)
Bone in pieces stay noticeably juicier through frying than boneless cuts, since the bone helps insulate the meat and slow moisture loss.
Kosher salt (applied ahead of time)
Salting the chicken and letting it sit before breading, rather than seasoning only in the flour, lets the salt penetrate the meat itself rather than just sitting on the surface.
Smoked paprika
Smoked paprika, white pepper, garlic powder, ground ginger, celery salt, mustard powder, thyme, basil, oregano This layered spice blend builds real depth into the seasoning applied directly to the chicken, separate from the breading itself, so the flavor runs all the way through rather than staying only on the crust.
Buttermilk
Tenderizes the chicken and helps the flour coating adhere evenly, thanks to its acidity and thickness.
Egg whites
Add structure to the wet dredge, helping the breading bond to the chicken and brown evenly.
All purpose flour and cornstarch
The combination is key to the crust’s texture flour builds structure, while cornstarch keeps the coating from absorbing too much oil, resulting in a lighter, crisper crust rather than a heavy, greasy one.
Vodka or neutral spirit (optional)
A small amount added to the wet mixture evaporates quickly in the hot oil, which can help the coating dry out and crisp up faster. It’s optional, and the chicken fries up well without it.
Peanut or vegetable oil
Both have a high smoke point and neutral flavor, ideal for maintaining a steady frying temperature without imparting unwanted taste.
Equipment Needed for Crispy, Juicy Fried Chicken
- Large Dutch oven or deep, heavy pot Retains heat steadily, which matters more for consistent frying than almost any other single factor.
- Wire rack set over a baking sheet Used twice: once for resting the breaded chicken before frying, and again for draining it afterward.
- Deep fry or candy thermometer Essential for monitoring oil temperature accurately throughout frying.
- Tongs For safely lowering chicken into hot oil and turning it as it cooks.
- Instant read meat thermometer To confirm the chicken has reached a safe internal temperature.
How to Make Crispy Juicy Fried Chicken (Step by Step)
1. Salt the chicken ahead of time
Lay the chicken pieces on a baking sheet and sprinkle with 1 tablespoon of salt. Let it sit at room temperature for 30 minutes, or refrigerate overnight for deeper flavor this early salting step is what lets seasoning penetrate the meat rather than staying only on the surface.
2. Mix the seasoning blend
In a bowl, combine smoked paprika, white pepper, garlic powder, ground ginger, celery salt, black pepper, mustard powder, thyme, basil, and oregano.
3. Season the chicken
Coat each piece with about half of the seasoning blend, pressing it in so the flavor reaches beyond just the surface.
4. Set up the breading station
In one bowl, combine flour, cornstarch, and the remaining salt. In another, whisk together buttermilk, egg whites, and the optional vodka. Set a wire rack over a baking sheet nearby.
5. Dredge the chicken
Dip each piece into the wet mixture, then coat thoroughly in the flour mixture, pressing firmly so the coating is thick and even on all sides. Place on the wire rack.
6. Let the coating rest
Let the breaded chicken rest for 10–30 minutes before frying. This short wait allows the coating to firm up and bond to the chicken, which is one of the biggest factors in whether the breading stays intact once it hits the oil.
7. Heat the oil
In a Dutch oven, heat the oil to 350°F. Set up a cooling station nearby with paper towels and a second wire rack.
8. Fry in batches
Carefully lower 3 pieces of chicken into the hot oil at a time, being careful not to overcrowd the pot. Fry for 12–15 minutes, flipping every 3–4 minutes, keeping the oil temperature around 325°F throughout. The chicken is done when deep golden brown and it reaches an internal temperature of 165°F.
9. Drain and rest
Transfer the fried chicken to a wire rack over paper towels to drain excess oil, then let it rest for 10 minutes before serving. This rest time helps lock in juiciness and lets the crust set fully.
Expert Tips for Best Results
- Salt the chicken well ahead of breading it’s a small step with a real impact on how seasoned the meat tastes all the way through.
- Don’t skip resting the breaded chicken before frying it’s the difference between a coating that stays intact and one that slides off in the oil.
- Watch the oil temperature closely and adjust the heat between batches, since adding cold chicken drops the temperature every time.
- Let the chicken rest after frying rather than serving immediately it locks in juiciness and lets the crust finish setting.
Common Mistakes to Avoid
- Seasoning only the breading, not the chicken itself. This leaves the crust flavorful but the meat underneath comparatively bland.
- Skipping the rest before frying. Coating that goes straight from the dredge into hot oil is far more likely to slip off during cooking.
- Overcrowding the frying pot. Too many pieces at once drops the oil temperature significantly, leading to greasy, unevenly cooked chicken.
- Not monitoring oil temperature. Oil that’s too hot burns the crust before the inside finishes cooking oil that’s too cool makes for a soggy, greasy result.
- Serving immediately, without resting. Cutting into the chicken right out of the fryer lets moisture escape before it’s had a chance to settle.
Variations and Customizations
- Double breading: For an even thicker, crunchier crust, dip the chicken a second time through the wet and dry mixtures before frying.
- Spicier version: Add cayenne pepper or hot sauce to the buttermilk mixture, or toss the finished chicken in a hot honey glaze.
- Boneless option: Boneless thighs or breasts work in a pinch, though they won’t stay quite as juicy as bone in pieces and will need a shorter fry time.
- Oven fried version: For a lighter alternative, bake the breaded chicken on a wire rack at 425°F for 35–45 minutes, flipping halfway, though the crust won’t be quite as crisp as deep frying produces.
- Milder flavor: Reduce or omit the cayenne and mustard powder for a more subtly seasoned version that’s easier on young or sensitive palates.
Storage Instructions
- Refrigerator: Store leftover fried chicken in an airtight container, lined with paper towels to absorb excess moisture, for up to 4 days.
- Freezer: Cooked, cooled fried chicken freezes reasonably well in a freezer safe container or bag for up to 3 months, though the crust will soften somewhat upon thawing and reheating.
- Make ahead tip: Coat and refrigerate the breaded chicken for up to 24 hours before frying, which also helps the coating set for an even crispier result.
Reheating Instructions
- Oven (best method): Reheat at 350°F for 10–15 minutes, placed on a wire rack, which helps restore crispiness better than any other method.
- Air fryer: Reheat at 375°F for about 8–10 minutes for a similarly crisp result with less time than the oven.
- Avoid the microwave if possible it tends to make the crust soggy rather than restoring its crunch, though it’s a fallback if speed matters more than texture.
Frequently Asked Questions
Can I use regular milk instead of buttermilk?
Yes. Add 1 tablespoon of lemon juice or vinegar to 1 cup of regular milk and let it sit for 5 minutes. This mimics buttermilk’s acidity closely enough to tenderize the chicken and help the coating adhere.
How can I get the crispiest crust?
Double dredge the chicken by coating it in the wet mixture, then flour, then repeating both steps for an extra thick, crunchy crust. Letting the coated chicken rest before frying also makes a significant difference.
What type of oil is best for frying?
Peanut or vegetable oil are both good choices, thanks to their high smoke points and neutral flavor, which let the chicken and seasoning take center stage rather than competing with the oil’s taste.
How do I make sure the breading sticks to the chicken?
Let the coated chicken rest for 10–30 minutes before frying, and avoid overcrowding the pot, both of which significantly reduce the chances of the coating sliding off during cooking.
Can I prepare the chicken ahead of time?
Yes. Coat and refrigerate it for up to 24 hours before frying this actually helps the breading set and fry up crispier than chicken breaded immediately before cooking.
Why is my fried chicken greasy instead of crispy?
This usually happens when the oil temperature drops too low, often from overcrowding the pot or not letting the oil recover between batches. Keeping the oil at a steady 325–350°F throughout frying prevents this.
Is bone in chicken necessary, or can I use boneless?
Bone in chicken, especially thighs and drumsticks, stays juicier during frying since the bone helps slow moisture loss. Boneless pieces will work, but they’re more prone to drying out and typically need a shorter fry time.
A Few Honest Final Thoughts
Good fried chicken isn’t complicated, but it does reward patience in a few specific spots salting ahead, resting the breading, and giving the oil time to recover between batches. Get those right, and you’ll have chicken with a crust that shatters properly and meat that stays genuinely juicy underneath. It’s worth the extra care, especially the first time you make it.
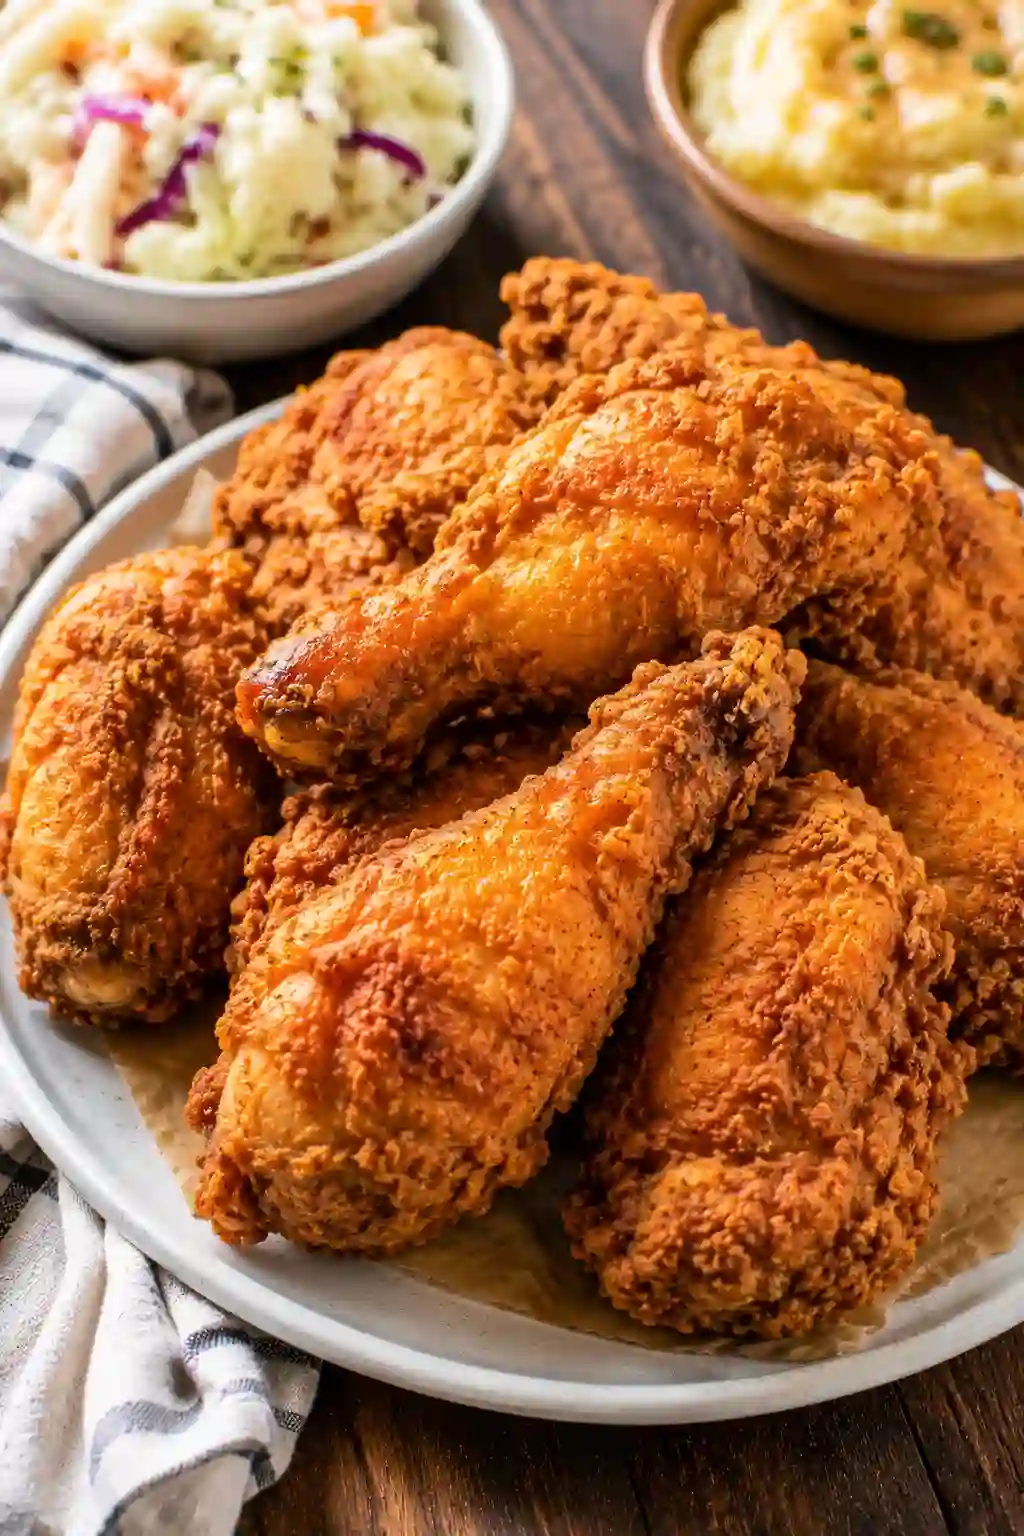
Crispy, Juicy Fried Chicken
Notes
Ingredients
For the Chicken:- 8 pieces bone in chicken (drumsticks and thighs recommended)
- 2 tablespoons kosher salt, divided
- 1 tablespoon smoked paprika
- 1 tablespoon white pepper
- 1 ½ teaspoons garlic powder
- 1 ½ teaspoons ground ginger
- 1 ½ teaspoons celery salt
- 1 ½ teaspoons black pepper
- 1 ½ teaspoons mustard powder
- 1 teaspoon dried thyme
- 1 teaspoon dried basil
- ½ teaspoon dried oregano
- 1 ½ cups all purpose flour
- 1 tablespoon cornstarch
- 1 ½ teaspoons salt
- 1 cup buttermilk
- 2 large egg whites
- 2 tablespoons vodka or neutral spirit (optional, for extra crispiness)
- 2 quarts peanut or vegetable oil
Instructions
- Lay chicken on a baking sheet and sprinkle with 1 tablespoon salt. Let sit 30 minutes at room temperature, or refrigerate overnight.
- Combine smoked paprika, white pepper, garlic powder, ginger, celery salt, black pepper, mustard powder, thyme, basil, and oregano in a bowl.
- Coat each chicken piece with about half the seasoning blend.
- Combine flour, cornstarch, and remaining salt in one bowl. Whisk buttermilk, egg whites, and vodka (if using) in another. Set a wire rack over a baking sheet.
- Dip chicken in wet mixture, then coat thoroughly in flour mixture, pressing firmly. Place on the wire rack.
- Let breaded chicken rest 10–30 minutes.
- Heat oil in a Dutch oven to 350°F.
- Fry 3 pieces at a time for 12–15 minutes, flipping every 3–4 minutes, maintaining oil around 325°F, until golden and internal temperature reaches 165°F.
- Drain on a wire rack over paper towels. Rest 10 minutes before serving.
Notes
- Salting the chicken ahead of breading seasons it all the way through, not just the crust.
- Resting the breaded chicken before frying is essential for the coating to stay intact.
- For extra crispiness, double dredge by repeating the wet and dry coating steps.
Storage
- Fridge: Airtight container lined with paper towels, up to 4 days.
- Freezer: Up to 3 months crust softens somewhat on thawing.
- Reheat: Oven at 350°F for 10–15 minutes on a wire rack, or air fryer at 375°F for 8–10 minutes. Avoid the microwave if possible.
Nutrition Estimate (per serving)
Calories: 1052 kcal | Carbohydrates: 46.5g | Protein: 37.9g | Fat: 77.8g | Saturated Fat: 11.4g | Cholesterol: 75mg | Sodium: 837.6mg | Potassium: 450mg | Fiber: 3.4g | Sugar: 3.9gNutrition values are estimates and will vary based on specific chicken pieces and oil absorption during frying.