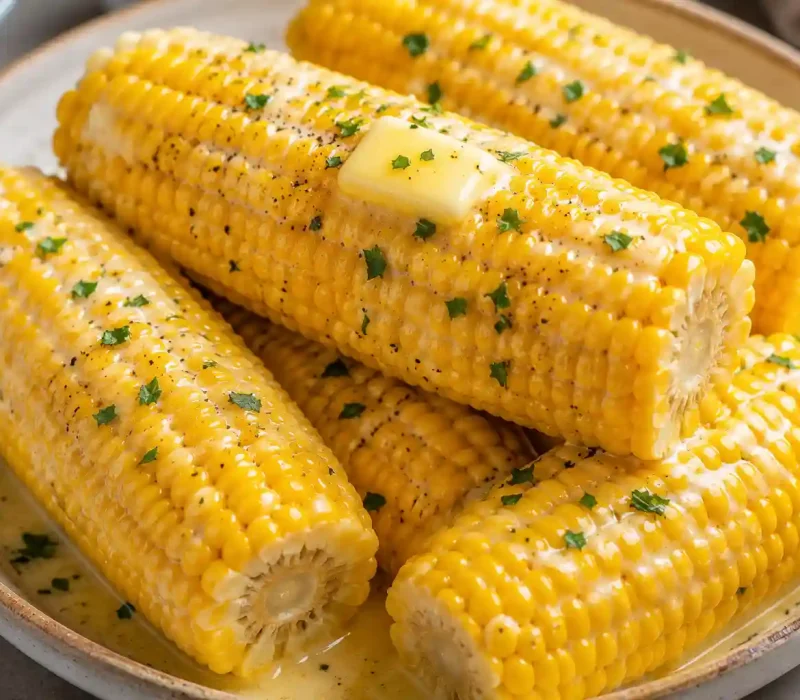
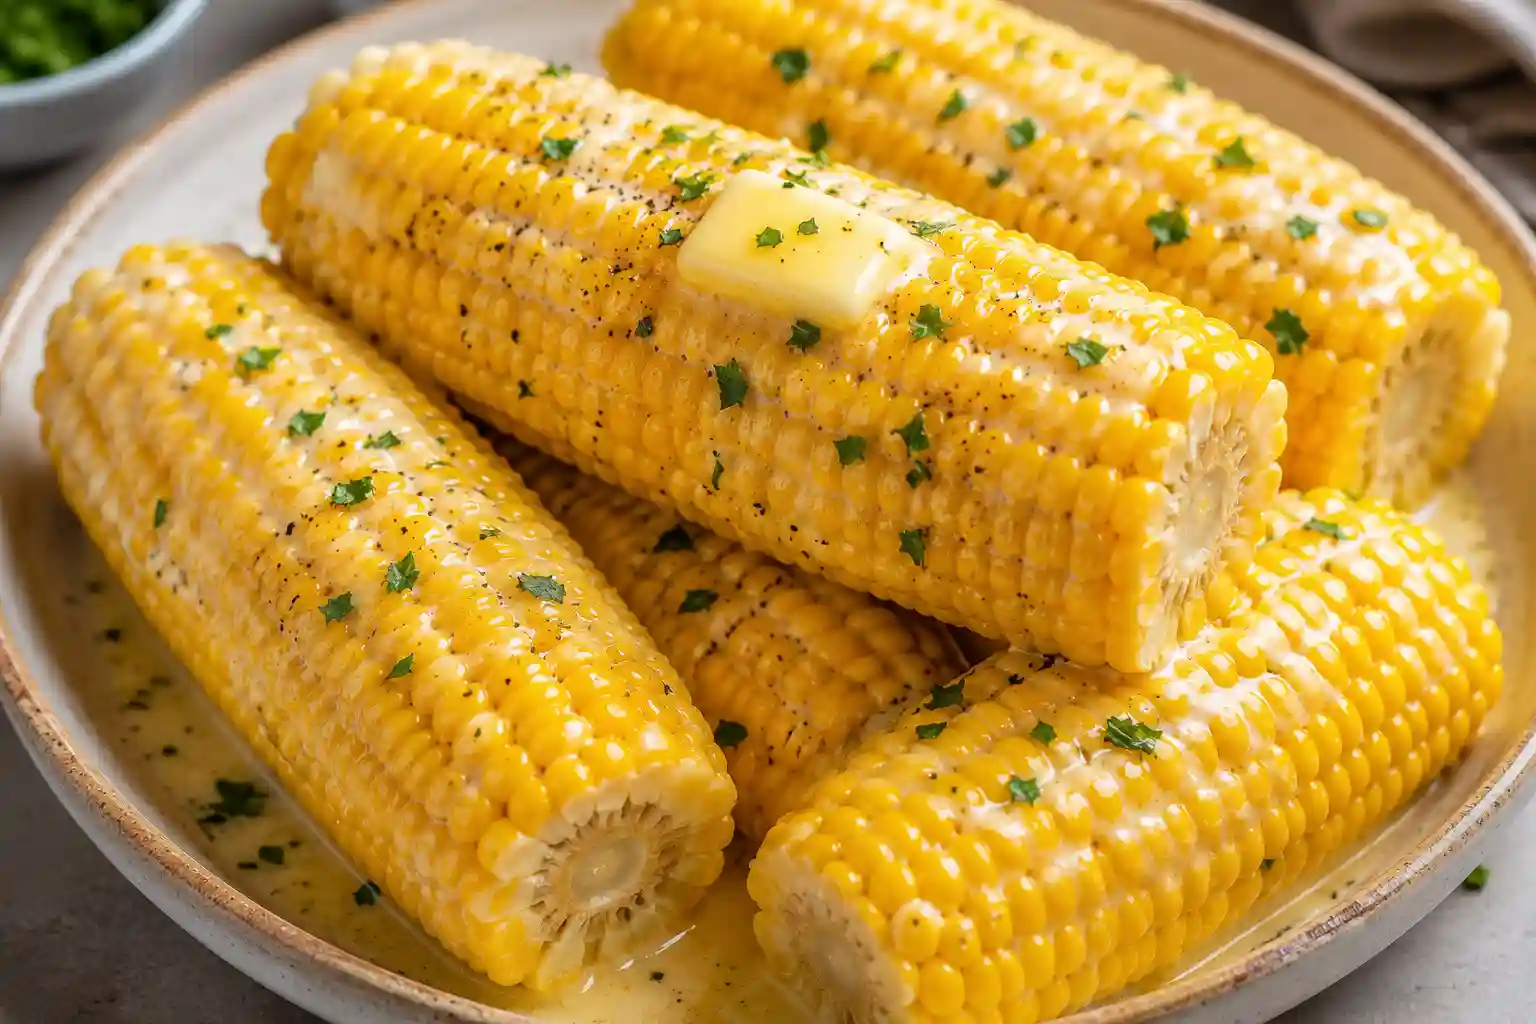
Boiled Corn on the Cob is an easy summer side dish made with fresh sweet corn simmered in milk, butter, and lightly salted water until tender, juicy, and packed with rich buttery flavor. This simple recipe creates soft, sweet kernels that pair perfectly with BBQs, seafood boils, cookouts, and family dinners.
Over the years, I’ve prepared corn on the cob in almost every way imaginable grilled, roasted, microwaved, air-fried, and traditionally boiled. However, whenever I want exceptionally juicy and buttery corn with extra-tender kernels, this milk-and-butter method delivers the best results.
What surprised me most when I first tested this technique was how much richer the corn tasted without feeling heavy. While the milk gently softens the kernels, the butter adds a silky richness that coats every bite. As a result, the corn remains fresh and naturally sweet while becoming noticeably more flavorful.
Whether you’re planning a backyard BBQ, a summer cookout, a seafood boil, or a simple weeknight dinner, this boiled corn on the cob recipe is one of the easiest and most reliable side dishes you can make.
What Is Boiled Corn on the Cob?
Boiled Corn on the Cob is fresh sweet corn cooked in a mixture of water, milk, butter, and salt until perfectly tender. It’s a classic summer side dish that has been enjoyed for generations at cookouts, family gatherings, picnics, and holiday celebrations.
Although many traditional recipes rely on salted water alone, adding milk and butter creates several benefits:
- Richer flavor
- Softer kernels
- Buttery texture
- Enhanced sweetness
Because of this, the corn stays juicy while its natural sweetness becomes even more pronounced.
Boiled corn on the cob is commonly served:
- With grilled meats
- At summer cookouts
- During seafood boils
- At holiday BBQs
- For picnic meals
- Alongside burgers and hot dogs
Why You’ll Love This Boiled Corn on the Cob Recipe
There are plenty of reasons to make this recipe again and again:
- Ready in under 20 minutes
- Rich buttery flavor
- Tender, juicy kernels
- Perfect summer side dish
- Family-friendly
- Easy to customize
- Great for BBQs and cookouts
- No special equipment required
Most importantly, it’s one of those comforting side dishes that feels both nostalgic and satisfying every single time.
Why Boiling Corn in Milk and Butter Works
A few simple ingredients can completely transform both the flavor and texture of fresh corn. First, milk softens the kernels while adding a subtle creaminess. Meanwhile, butter creates a rich flavor that lightly coats every ear of corn. In addition, salt enhances the natural sweetness without making the corn taste salty. Finally, gentle simmering helps keep the kernels juicy and tender.
If your corn isn’t perfectly in season, a small amount of honey or sugar can further enhance its sweetness.
When I tested a batch using only water, the corn still tasted good. However, the kernels weren’t nearly as tender or buttery. By comparison, the milk-and-butter version produced noticeably richer flavor and a softer texture.
I also discovered that aggressively boiling corn can toughen the kernels slightly. Therefore, a gentle simmer is the best approach because it preserves tenderness while maintaining a pleasant bite.
Ingredient Breakdown
Fresh Corn on the Cob
Fresh sweet corn is the star of this recipe.
Look for:
- Bright green husks
- Golden silk
- Plump kernels
- Firm ears
For the sweetest flavor and best texture, choose fresh summer corn whenever possible.
How Many Ears Per Person?
As a general rule, plan for:
- 1 ear per person for smaller meals
- 2 ears per person for BBQs and cookouts
This is especially helpful when corn is one of the main side dishes on the menu.
Whole Milk
Whole milk adds richness while gently softening the kernels.
You can also use:
- 2% milk
- Half-and-half
- Oat milk
- Coconut milk
However, whole milk provides the creamiest overall texture.
Butter
Butter is what makes this version stand out from traditional boiled corn. Both salted and unsalted butter work well. As the corn cooks, the butter forms a silky layer throughout the liquid, lightly coating each ear. Additionally, brushing extra melted butter over the hot corn before serving adds even more flavor.
Salt
Salt balances the sweetness of the corn and enhances its natural flavor. Rather than making the corn taste salty, it simply helps bring out the sweetness already present in the kernels.
Honey or Sugar
Honey or sugar is optional. However, it can be especially helpful when:
- Corn isn’t at peak-season freshness
- The kernels are less naturally sweet
Honey adds a slightly deeper flavor, while sugar keeps the taste light and clean.
Equipment Needed
Fortunately, you only need a few basic kitchen tools:
For best results, use a wide pot so the corn can cook evenly without overcrowding.
How to Boil Corn on the Cob
Step 1: Prepare the Corn
Begin by removing the husks and silk from each ear of corn.
Next, rinse the corn thoroughly under cold water to remove any remaining silk strands. If stubborn pieces remain, a damp paper towel works surprisingly well for grabbing them quickly.
Once cleaned, set the corn aside while you prepare the cooking liquid.
Step 2: Prepare the Cooking Liquid
Fill a large pot with water and bring it to a gentle boil.
Then reduce the heat slightly and add:
- Milk
- Butter
- Salt
- Honey or sugar (optional)
Stir well until the butter melts completely and the ingredients are fully combined.
At this stage, the cooking liquid should smell rich, buttery, and slightly sweet.
Step 3: Add the Corn
Carefully place the ears of corn into the pot. Ideally, the corn should remain mostly submerged in the liquid. If necessary, rotate the ears once during cooking to ensure even heating. Because the kernels cook quickly, there’s no need to overcrowd the pot.
Step 4: Simmer Gently
Cover the pot and allow the corn to simmer gently for about 7 to 10 minutes.
Avoid a rapid rolling boil, as excessive heat can make the kernels tougher and less juicy.
You’ll know the corn is ready when:
- The kernels appear bright yellow
- The texture feels tender
- The corn smells sweet and buttery
- The kernels burst slightly when bitten
Fresh summer corn cooks surprisingly fast, so keep a close eye on it.
Step 5: Serve Immediately
Once cooked, carefully remove the corn using tongs.
Then serve it hot with your favorite toppings such as:
- Extra melted butter
- Flaky sea salt
- Black pepper
- Parmesan cheese
- Cotija cheese
- Fresh herbs
- Lime wedges
The finished corn should be:
- Juicy
- Buttery
- Tender
- Slightly creamy
At the same time, it should still maintain a pleasant bite.
Best Toppings for Corn on the Cob
One of the best things about corn on the cob is how easy it is to customize.
Some favorite toppings include:
- Melted garlic butter
- Flaky sea salt
- Parmesan cheese
- Cotija cheese
- Chili powder
- Smoked paprika
- Fresh cilantro
- Lime juice
- Cracked black pepper
- Cajun seasoning
For even more flavor, combine several toppings together. For example, lime juice and Cotija cheese create a delicious Mexican-inspired variation.
Expert Tips for the Best Boiled Corn on the Cob
Use Fresh Corn Whenever Possible
For the sweetest flavor and juiciest texture, choose fresh corn whenever it’s available. Freshly harvested corn naturally contains more sugar and moisture, which greatly improves the final result.
Don’t Overcook the Corn
Corn cooks quickly. Therefore, avoid extending the cooking time unnecessarily. Overcooked kernels can become mushy or slightly chewy.
Simmer Instead of Boiling Aggressively
Gentle heat helps preserve the corn’s natural texture.
As a result, the kernels remain tender and juicy instead of becoming tough.
Add Butter After the Water Heats
Although butter is an essential ingredient, adding it after the water begins heating helps the milk mixture stay smoother. Consequently, the cooking liquid remains better combined throughout the process.
Serve Immediately
Freshly cooked corn always tastes best when served hot.
Additionally, hot kernels absorb butter and seasonings more effectively.
Common Mistakes to Avoid
Overcooking the Corn
Too much cooking time can cause the kernels to lose their ideal texture.
Instead, cook only until tender.
Using Older Corn
Unfortunately, older corn loses sweetness fairly quickly.
For that reason, fresh corn makes a noticeable difference in both flavor and texture.
Boiling Too Aggressively
While it may seem faster, a vigorous boil can toughen the kernels.
A gentle simmer consistently produces better results.
Forgetting Salt
Salt plays an important role in enhancing the natural sweetness of the corn.
Without it, the flavor may seem less vibrant.
Leaving Silk on the Corn
Corn silk becomes unpleasant once cooked.
Therefore, take a few extra minutes to remove as much silk as possible before cooking.
Variations and Customizations
Mexican Street Corn (Elote)
Transform your corn into a popular street-food favorite by topping it with:
- Mayonnaise
- Cotija cheese
- Chili powder
- Fresh cilantro
- Lime juice
As a result, you’ll get a bold combination of creamy, tangy, and spicy flavors.
Garlic Butter Corn
For extra richness, add:
- Minced garlic
- Fresh parsley
- Thyme
to the butter mixture before serving.
This variation pairs especially well with grilled meats.
Parmesan Corn on the Cob
For a savory twist, toss hot corn with:
- Parmesan cheese
- Melted butter
- Black pepper
The result is simple yet incredibly flavorful.
Cajun Corn on the Cob
If you enjoy spicy foods, sprinkle the corn with:
- Cajun seasoning
- Smoked paprika
- Garlic powder
This Southern inspired version delivers plenty of bold flavor.
Dairy-Free Corn on the Cob
Need a dairy free option? Simply replace the dairy ingredients with:
- Oat milk
- Coconut milk
- Vegan butter
Even with these substitutions, the corn remains deliciously tender and flavorful.
What to Serve With Boiled Corn on the Cob
Boiled corn on the cob pairs beautifully with a variety of main dishes and summer favorites.
Some of the best options include:
- Grilled chicken
- BBQ ribs
- Burgers
- Hot dogs
- Steak
- Baked salmon
- Shrimp boil
- Macaroni salad
- Coleslaw
- Baked beans
Additionally, corn works wonderfully for:
- Summer cookouts
- Holiday BBQs
- Family dinners
- Seafood feasts
- Picnic meals
Because of its naturally sweet flavor, it complements both smoky grilled foods and lighter dishes.
Is Boiled Corn on the Cob Healthy?
Yes, boiled corn on the cob can absolutely be part of a balanced diet.
Fresh corn naturally contains:
- Fiber
- Antioxidants
- Vitamin C
- Essential minerals
- Carbohydrates for energy
Furthermore, corn is naturally filling, making it a satisfying side dish.
If you’d like a lighter version, consider:
- Using less butter
- Skipping the honey or sugar
- Choosing lighter toppings
Even so, fresh sweet corn remains a nutritious and wholesome ingredient on its own.
Storage Instructions
Refrigerator
If you have leftovers, allow the corn to cool completely before storing.
Then place it in an airtight container and refrigerate for up to 3 days.
You can store:
- Whole ears of corn
- Corn kernels cut from the cob
Either option works well depending on how you plan to use the leftovers.
Reheating Instructions
Microwave
Wrap each ear of corn in a damp paper towel.
Then microwave until heated through.
This method helps prevent the kernels from drying out.
Stovetop
Alternatively, place the corn in hot water for about 2 to 3 minutes.
As a result, the kernels warm up evenly without becoming overcooked.
Oven
For larger batches, wrap the corn in foil and heat at 350°F until warmed through.
This method works especially well when serving several people.
Can You Freeze Corn on the Cob?
Yes, corn freezes surprisingly well.
For the best results:
- Allow the corn to cool completely.
- Cut the kernels from the cob.
- Transfer the kernels to airtight freezer bags.
- Freeze for future use.
Frozen corn is excellent for:
- Soups
- Chowders
- Casseroles
- Salads
- Pasta dishes
Therefore, freezing is a great way to preserve extra summer corn.
Make Ahead Tips
If you’re preparing for a gathering, this recipe can be made slightly ahead of time. Simply cook the corn and leave it in the warm cooking liquid with the heat turned off for about 10 to 15 minutes.
This method works particularly well for:
- BBQs
- Cookouts
- Seafood boils
- Holiday meals
- Large family dinners
As a bonus, the corn stays warm while continuing to absorb flavor.
Frequently Asked Questions
How long should you boil corn on the cob?
Fresh corn typically needs about 7 to 10 minutes in gently simmering liquid. However, cooking times may vary slightly depending on the size of the ears.
Can you boil corn in milk and butter?
Absolutely. In fact, milk and butter help create softer kernels, richer flavor, and a more buttery texture while keeping the corn juicy.
Should corn be boiled with the husks on?
For this recipe, it’s best to remove the husks first. Doing so allows the milk-and-butter mixture to coat the kernels directly.
Can I use frozen corn on the cob?
Yes, frozen corn works well. Simply add a few extra minutes to the cooking time to ensure it heats through completely.
Can I use canned corn?
Although canned corn is useful for many recipes, fresh corn on the cob provides the best texture and flavor for this dish.
Why is my corn chewy?
Chewy corn is often caused by overcooking or using older corn. Therefore, fresh corn and gentle simmering produce the best results.
Do you need sugar when boiling corn?
Not necessarily. Fresh summer corn is naturally sweet. However, a small amount of honey or sugar can enhance flavor when the corn isn’t at peak freshness.
What’s the best butter for corn on the cob?
Both salted and unsalted butter work well. Nevertheless, salted butter adds a slightly richer savory flavor.
Final Thoughts
Boiled Corn on the Cob is one of those timeless summer side dishes that never goes out of style. Not only is it simple and affordable, but it’s also family friendly and incredibly satisfying during sweet corn season.
What makes this version special is the combination of milk and butter. While traditional boiling methods certainly work, this technique creates noticeably softer, juicier, and more flavorful kernels without masking the natural sweetness of the corn.
Moreover, the recipe requires only a handful of ingredients and comes together in less than 20 minutes. Whether you’re hosting a backyard BBQ, planning a seafood boil, or simply looking for an easy weeknight side dish, this recipe is always a dependable choice.
Overall, if you’re searching for the best boiled corn on the cob recipe, this milk and butter method deserves a permanent spot in your summer cooking rotation. One bite of the tender, buttery kernels, and you’ll understand why it’s become a favorite for so many families year after year.
Boiled Corn on the Cob
Notes
Ingredients
- 6 ears fresh sweet corn, husked and cleaned
- 6 cups water
- 2 cups whole milk
- 8 tablespoons salted butter
- 2 tablespoons salt
- ¼ cup honey or sugar (optional)
Optional Toppings
- Extra melted butter
- Parmesan cheese
- Cotija cheese
- Chili powder
- Lime wedges
- Fresh herbs
Instructions
- Remove husks and silk from the corn.
- Bring water to a gentle boil in a large pot.
- Reduce heat slightly and add milk, butter, salt, and optional honey or sugar.
- Stir until the butter melts fully.
- Add corn to the pot and cover.
- Simmer gently for 7–10 minutes.
- Remove corn carefully using tongs.
- Serve immediately with favorite toppings.
Notes
- Fresh summer corn gives the best flavor and texture.
- Avoid rapid boiling to keep kernels tender.
- Whole milk creates the creamiest texture.
- Honey boosts sweetness if the corn isn’t peak-season fresh.