
Some nights simply don’t call for a recipe with a long ingredient list or multiple pans to wash. That’s exactly when Baked Caesar Chicken comes to the rescue. This easy, creamy chicken dinner tastes like you spent hours in the kitchen, even though it comes together with minimal effort.
In this Baked Caesar Chicken recipe, juicy chicken breasts are coated in rich Caesar dressing, baked until perfectly tender, and finished under the broiler with a generous layer of Parmesan cheese. The cheese becomes golden and lightly crisp around the edges, creating a savory topping that makes every bite irresistible.
I’ve relied on this Baked Caesar Chicken recipe more times than I can count during busy weeks when cooking felt like a chore. What surprised me most was how much flavor bottled Caesar dressing adds on its own. With garlic, lemon, anchovies, and Parmesan already in the dressing, Baked Caesar Chicken delivers a rich, restaurant-quality meal without reaching for a cabinet full of seasonings.
If you appreciate the simplicity of recipes like an easy chicken scallopini recipe but want something even more hands off, this is it.
Why You Will Love This Recipe
- Only Three Ingredients: Chicken, Caesar dressing, and Parmesan cheese. That is genuinely all you need (salt and pepper are freebies).
- One Dish Cleanup: Everything bakes in a single roasting pan, meaning there is no juggling of multiple skillets on a busy weeknight.
- Ready in 35 Minutes: It takes about five minutes of active prep time, and the oven does all of the heavy lifting.
- Naturally Low Carb: Because there is no flour, heavy breading, or added sugars, this meal fits perfectly into a low carb or keto lifestyle.
- Incredible Meal Prep: It reheats wonderfully and works perfectly sliced cold over salads, tucked into wraps, or served alongside simple pasta for lunch the next day.
The History Behind the Flavors
Baked Caesar Chicken is a very modern American comfort food shortcut. It is made by baking chicken breasts in creamy dressing and topping them with cheese. While the baked chicken dish itself is a relatively new internet phenomenon, its signature flavor profile comes from the world-famous Caesar salad.
The story behind Baked Caesar Chicken begins with the famous Caesar salad, created by restaurateur Caesar Cardini in Tijuana, Mexico, during the 1920s. His signature dressing combined bold flavors like raw garlic, Worcestershire sauce, lemon juice, egg yolks, and Parmesan cheese to create a rich, savory dressing that quickly became popular.
Over time, home cooks discovered that the same flavorful dressing worked beautifully as both a marinade and a sauce for chicken. That’s how Baked Caesar Chicken became a favorite weeknight dinner, transforming a simple bottle of Caesar dressing into a creamy, cheesy baked meal with very little effort.
Today, Baked Caesar Chicken is loved for its simplicity, rich flavor, and convenience, making it a go-to recipe for busy families who want a satisfying dinner without spending hours in the kitchen.
Ingredient For Baked Caesar Chicken
Because you are only using three items to make Baked Caesar Chicken , the quality and specific type of those ingredients genuinely dictate how the final dish will taste.
The Chicken Breasts
Boneless, skinless chicken breasts are the classic choice for Baked Caesar Chicken. They cook evenly when pounded to a uniform thickness, helping the chicken stay tender and juicy while the Caesar dressing and Parmesan create a rich, golden topping.
If you prefer darker meat, boneless, skinless chicken thighs are an excellent substitute for Baked Caesar Chicken. They stay extra juicy and are more forgiving if left in the oven a few minutes longer. You can also use bone-in chicken pieces, but keep in mind they’ll need additional baking time to reach a safe internal temperature while still delivering the delicious flavor that makes Baked Caesar Chicken so popular.
Creamy Caesar Dressing
The dressing is doing 95 percent of the flavor work in this recipe, which means the quality genuinely matters. A thick, high-quality, well-seasoned bottled dressing gives you that garlicky, tangy, umami-rich flavor without needing to add separate spices.
You must look for a dressing labeled “creamy.” Thin, watery, vinaigrette-style dressings tend to slide right off the raw chicken and pool at the bottom of the baking dish instead of coating the meat. If you prefer to make your own from scratch, a quick blend of real mayonnaise, fresh lemon juice, minced garlic, Dijon mustard, and grated Parmesan will get you very close to a thick bottled texture.
Parmesan Cheese
This is what finishes the dish under the broiler and creates that gorgeous crust. I highly recommend taking the extra 60 seconds to grate fresh Parmesan from a solid block.
Freshly grated cheese melts much more evenly and browns significantly better than the pre-shredded kind sold in plastic tubs. Pre-shredded cheese is almost always coated in an anti-caking starch (like cellulose) to prevent it from sticking together in the package. That same powder prevents it from melting into a smooth, golden crust on top of your chicken, often making it clump or burn instead.
Equipment Needed For Baked Caesar Chicken
- 9x13inch Baking Dish
- Meat Mallet (or heavy skillet)
- Mixing Bowl
- Measuring Cups and Spoons
- InstantRead Thermometer
- Aluminum Foil (optional)
- OvenSafe Spatula or Tongs
Recommended Equipment
- Meat Mallet: Helps pound chicken to an even thickness for uniform cooking.
- InstantRead Thermometer: Ensures the chicken reaches a safe internal temperature of 165°F (74°C).
- 9x13inch Baking Dish: Perfect size for baking chicken evenly without overcrowding.
How To Make Baked Caesar Chicken
1. Preheat and Prepare the Dish
Preheat your oven to 400°F. Lightly grease a standard 9×13 inch glass or ceramic baking dish with olive oil or a nonstick cooking spray. This ensures the chicken and the caramelized dressing do not stick to the bottom as it bakes.
2. Pound the Chicken Evenly
Place the raw chicken breasts between two sheets of heavy plastic wrap. Using a heavy meat mallet or the bottom of a cast-iron skillet, pound the meat until it reaches an even half-inch thickness across the entire breast.
This is the step people skip the most often, and it is the exact reason chicken sometimes comes out dry and chalky on the thin edges while the thick center is still dangerously pink and underdone. An even thickness guarantees even cooking.
3. Coat with the Dressing
Arrange the pounded chicken in your prepared baking dish. Pour the creamy Caesar dressing directly over the top of the meat. Use tongs to flip each piece a few times so that it is fully and evenly coated on both sides. The thick dressing acts as both a robust seasoning and a light moisture barrier, keeping the chicken incredibly juicy as it roasts.
4. Bake Until Nearly Done
Bake the chicken uncovered for 20 to 25 minutes. You are looking for the chicken to reach an internal temperature of about 160°F on a digital meat thermometer.
It will finish climbing to the USDA recommended safe temperature of 165°F during the final broiling step, so do not panic if it is just a few degrees shy of that mark when you pull it out. Following proper safe poultry handling guidelines is crucial for a safe dinner.
5. Add the Cheese and Broil
Pull the hot baking dish out of the oven. Sprinkle your freshly grated Parmesan cheese evenly over the top of each piece of chicken.
Switch your oven setting from bake to broil. Return the dish to the oven for 3 to 4 minutes. You must watch it very closely. Oven broilers vary wildly in intensity, and the difference between a perfectly golden brown crust and a blackened, ruined dinner can be less than 45 seconds. The cheese is ready when it is fully melted, bubbling aggressively, and lightly browned at the edges.
6. Rest, Garnish, and Serve
Remove the dish from the oven and let the chicken rest undisturbed for 3 to 5 minutes before serving. This brief resting period keeps all the boiling internal juices from running out the moment you cut into the meat. Garnish with a little chopped fresh parsley if you want a pop of green color, and serve immediately.
Expert Tips for Baked Caesar Chicken
- Do Not Skip the Pounding: Even if it feels like a messy extra step, pounding the meat flat is the single biggest factor in whether the dish comes out evenly cooked and juicy.
- Use a Real Thermometer: Always use an instant-read meat thermometer rather than guessing by the color of the juices. Because Caesar dressing browns quickly in the oven, the chicken can look completely done on the outside while remaining raw in the center.
- Guard the Broiler: Never walk away to check your phone during the broiling step. A few extra seconds is the absolute difference between a beautiful golden crust and a burnt, bitter disaster.
- Thick Dressing Only: Choose the absolute thickest, creamiest bottled Caesar dressing you can find on the shelf. Thin dressings simply will not cling to the meat during the baking process.
Common Mistakes to Avoid
Skipping the Pounding Step As mentioned above, uneven chicken thickness is the most common reason this dish turns out dry in thin spots and dangerously underdone in the thickest parts.
Walking Away During Broiling Parmesan cheese has a low moisture content. It can go from perfectly golden to acrid and burnt in under a minute under a hot broiler. Stay close and watch it happen.
Using a Vinaigrette Dressing If you accidentally buy a thin, vinaigrette-style Caesar, it will not coat the chicken properly. It tends to separate and pool into an oily mess in the baking dish instead of forming a creamy, baked-on sauce.
Reusing Raw Dressing Any leftover dressing that has touched the raw chicken in the baking dish should be discarded immediately. Never spoon the raw juices over the finished dish or save it for another use. This is a strict food safety rule, not a culinary suggestion.
Overcrowding the Baking Dish If you try to jam six large chicken breasts into a small pan and they overlap, they will steam in their own juices instead of baking properly, and the dressing will never caramelize on the edges.
Delicious Recipe Variations For Baked Caesar Chicken
- Spicy Caesar: Stir a teaspoon of crushed red pepper flakes or a few heavy dashes of your favorite hot sauce directly into the dressing before pouring it over the chicken.
- Extra Garlicky: If you love pungent flavors, add a clove or two of freshly minced garlic on top of the dressing before baking, right on top of whatever garlic is already blended into the bottle.
- Air Fryer Method: You can air fry the pounded, dressing-coated chicken at 375°F for 12 to 15 minutes. Top with the Parmesan cheese and air fry for an additional 2 minutes until it is melted and bubbly.
- The Crunch Factor: Mix a few tablespoons of crispy panko breadcrumbs into the grated Parmesan cheese before you broil it. This creates a much crunchier, more textured crust on top. If your family loves a crispy coating, you might also want to try making a classic easy crispy chicken fried steak later in the week.
Perfect Side Dish Pairings
Because the flavor of the baked Caesar dressing is quite rich and heavy, this chicken pairs beautifully with sides that offer a bit of bright, acidic contrast or a satisfying crunch.
A massive, crisp green salad (perhaps even a traditional Caesar salad) is the most obvious and delicious choice. If you want a more substantial meal, serve the chicken alongside roasted asparagus, garlic butter green beans, or a chilled easy cucumber salad recipe to cut through the richness. For a comforting starch, you can never go wrong slicing this chicken and serving it directly over buttered angel hair pasta or a scoop of creamy mashed potatoes.
Proper Storage and Reheating For Baked Caesar Chicken
To Store: Let any leftover chicken cool completely to room temperature. Transfer the meat to an airtight glass or plastic container. Refrigerate for up to 3 to 4 days safely.
To Freeze: This chicken freezes surprisingly well. Place the fully cooled chicken in a freezer-safe container or heavy-duty bag for up to 2 months. You must thaw it completely in the refrigerator overnight before attempting to reheat it.
To Reheat (Best Method): The absolute best way to reheat this without turning the meat to rubber is in the oven. Preheat your oven to 350°F. Place the chicken in a baking dish, cover it tightly with foil to trap the moisture, and heat for about 10 minutes until warmed all the way through.
To Reheat (Microwave): If you are in a rush, place the chicken on a microwave-safe plate. Add a tiny splash of water or a small spoonful of fresh Caesar dressing over the top to keep it moist, and heat in gentle 30-second intervals until warm.
FAQS Baked Caesar Chicken
Can I use chicken thighs instead of breasts?
Yes, boneless, skinless chicken thighs work exceptionally well in this recipe. They naturally contain more fat and tend to stay much juicier than breasts. You may need to adjust the baking time slightly, as dark meat can sometimes take a few extra minutes depending on the overall thickness.
What if my Caesar dressing is too thin?
Thin dressing tends to pool at the bottom of the pan instead of coating the chicken evenly. You should always look for a thicker, creamy style dressing. However, if you are stuck with a thin one, you can thicken it slightly by whisking in a spoonful of mayonnaise or extra grated Parmesan cheese before pouring it over the raw chicken.
Is baked Caesar chicken low carb or keto friendly?
Yes, this specific recipe is naturally very low in carbohydrates. Because it contains no flour, breading, or added refined sugars, it makes a fantastic fit for low carb or keto style eating plans.
Can I use homemade Caesar dressing instead of store bought?
Yes you can, though traditional homemade dressing made with egg yolks and oil is often slightly thinner than commercial bottled versions, so it may not cling to the chicken quite as well. A thicker, mayonnaise-based homemade Caesar recipe works best for surviving the baking process.
Do I need to season the chicken with salt and pepper first?
It is not strictly necessary. Bottled Caesar dressing is already heavily seasoned with salt, garlic, and Parmesan. However, a light sprinkle of freshly cracked black pepper on the bare chicken before baking certainly does not hurt if you enjoy extra seasoning.
Can I marinate the chicken in the dressing ahead of time?
Yes, this is a great meal prep strategy. You can place the raw chicken and the dressing together in a sealed zip-top bag and leave it in the refrigerator for up to 48 hours before baking. The acid in the dressing will help tenderize the meat further.
Why is my Baked Caesar Chicken dry?
Baked Caesar Chicken can become dry if it’s overcooked. Bake the chicken until it reaches an internal temperature of 165°F (74°C), then let it rest for a few minutes before serving to keep it juicy.
What vegetables go well with Baked Caesar Chicken?
Baked Caesar Chicken pairs wonderfully with roasted broccoli, asparagus, green beans, Brussels sprouts, or a fresh Caesar salad. These sides balance the creamy, savory flavors perfectly.
Conclusion
Baked Caesar Chicken proves that you don’t need complicated techniques or a long list of ingredients to make a delicious homemade dinner. With juicy chicken, creamy Caesar dressing, and a golden Parmesan topping, this recipe delivers big flavor with very little effort. Once you make Baked Caesar Chicken for the first time, you’ll see just how simple and satisfying it can be.
For the best results, take a couple of extra minutes to pound the chicken to an even thickness and keep a close eye on it under the broiler so the cheese turns golden without burning. This Baked Caesar Chicken is perfect for busy weeknights, family dinners, or anytime you need an easy, reliable meal. After one bite, Baked Caesar Chicken is sure to become a permanent favorite in your weekly dinner rotation.
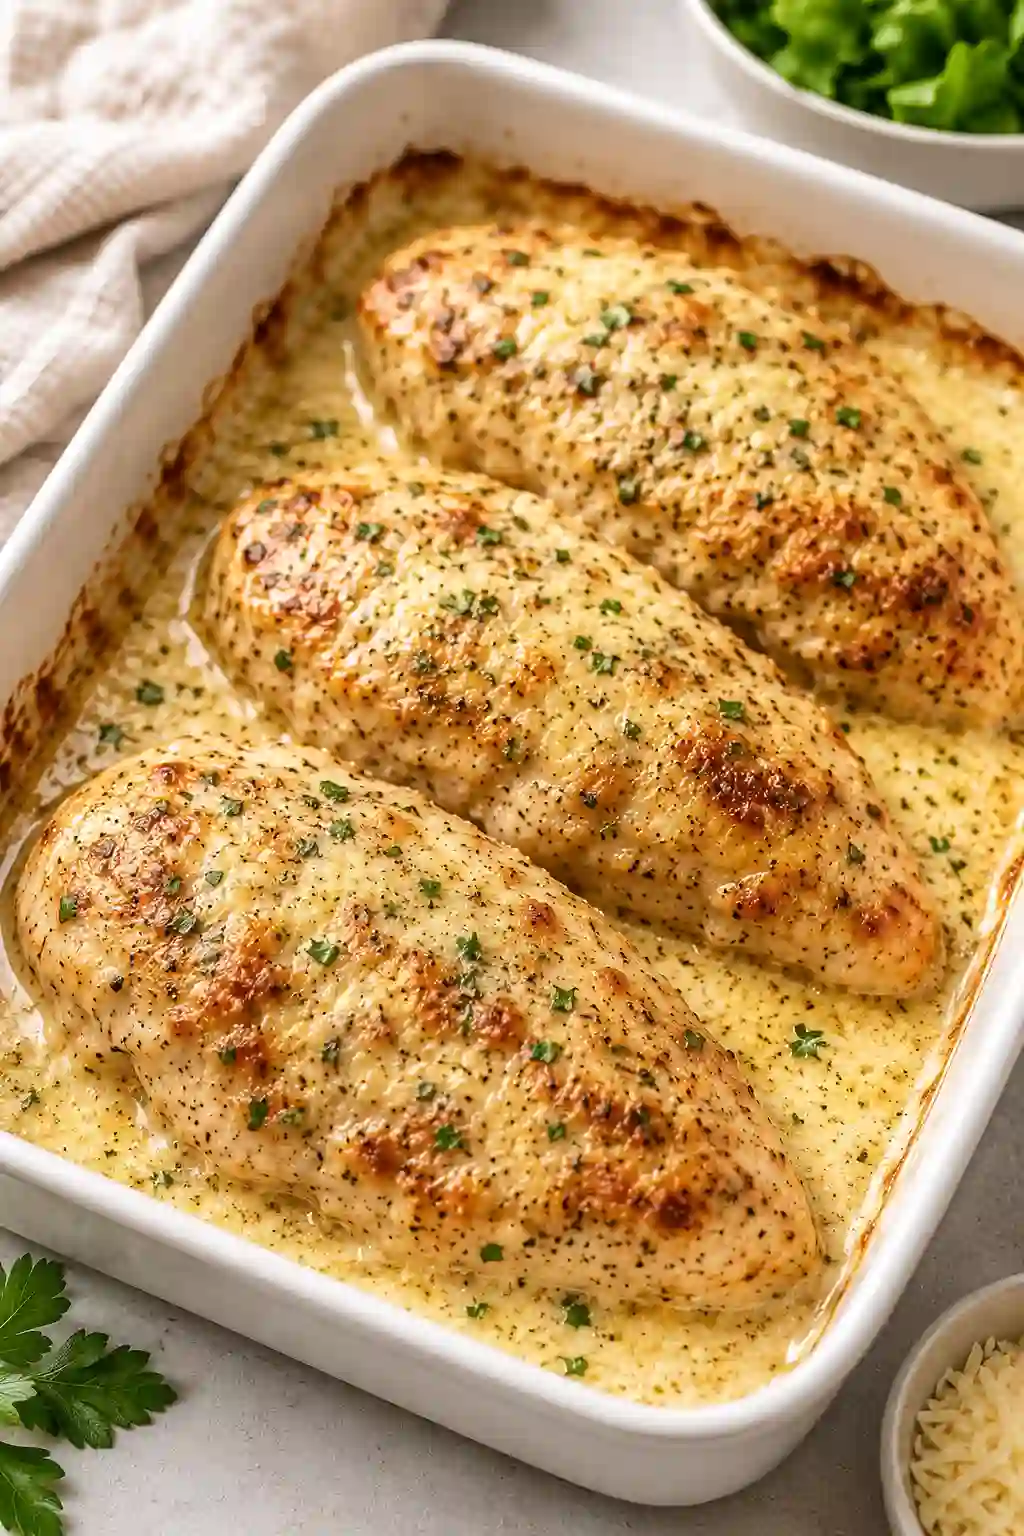
3 Ingredient Baked Caesar Chicken
Notes
Ingredients
- 4 boneless, skinless chicken breasts (about 2 lbs)
- 1 cup creamy Caesar dressing
- 2 oz Parmesan cheese, finely grated (about ½ cup)
- 2 tablespoons chopped fresh parsley (optional, for garnish)
Instructions
- Preheat oven to 400°F. Lightly grease a 9×13 inch baking dish.
- Pound chicken breasts to an even ½ inch thickness between sheets of plastic wrap.
- Place chicken in the baking dish and pour Caesar dressing over the top, flipping to coat both sides evenly.
- Bake uncovered for 20–25 minutes, until chicken reaches about 160°F internally.
- Remove from oven, sprinkle evenly with Parmesan, and switch the oven to broil. Broil 3–4 minutes, watching closely, until cheese is melted and golden.
- Rest 3–5 minutes, garnish with parsley if using, and serve.
Notes
- Pound the chicken to an even thickness for the most consistent results.
- Stay near the oven during broiling it browns fast.
- Discard any dressing the raw chicken sat in rather than reusing it as a sauce.
Storage
Refrigerate leftovers in an airtight container up to 3–4 days.Freeze cooked, cooled chicken in a freezer safe container up to 2 months.
Reheat in a 350°F oven for about 10 minutes, or in the microwave with a splash of water or dressing to keep it moist.
Nutrition Estimate (per serving)
Calories: ~382 | Protein: ~66g | Fat: ~11g | Saturated Fat: ~4g | Carbohydrates: ~0.5g | Sodium: ~317mgNutrition values are estimates and will vary based on the specific brand of dressing and portion sizes.